

This guide explains how to install additional plugins for Deluge.
You can find the complete list of available Deluge plugins here:
http://dev.deluge-torrent.org/wiki/Plugins
Before You Begin
Most Deluge plugins cannot be installed through the Deluge WebUI. Instead, they must be installed using the Deluge Thin Client.
If you have not configured the Deluge Thin Client yet, please follow this guide first:
Step 1 – Download the Plugin
Download the plugin you would like to install.
Before downloading it, check which Python version your Deluge installation uses:
python --version
If the command above is not available, try:
python3 --version
Download the plugin version that matches the Python version installed on your service.
For example, if your service uses Python 2.7, the plugin filename should end with:
XXX-py2.7.egg
In this guide, we will use YaRSS2-1.4.3-py2.7.egg as an example.
Step 2 – Install the Plugin
Open:
Preferences → Plugins → Install Plugin
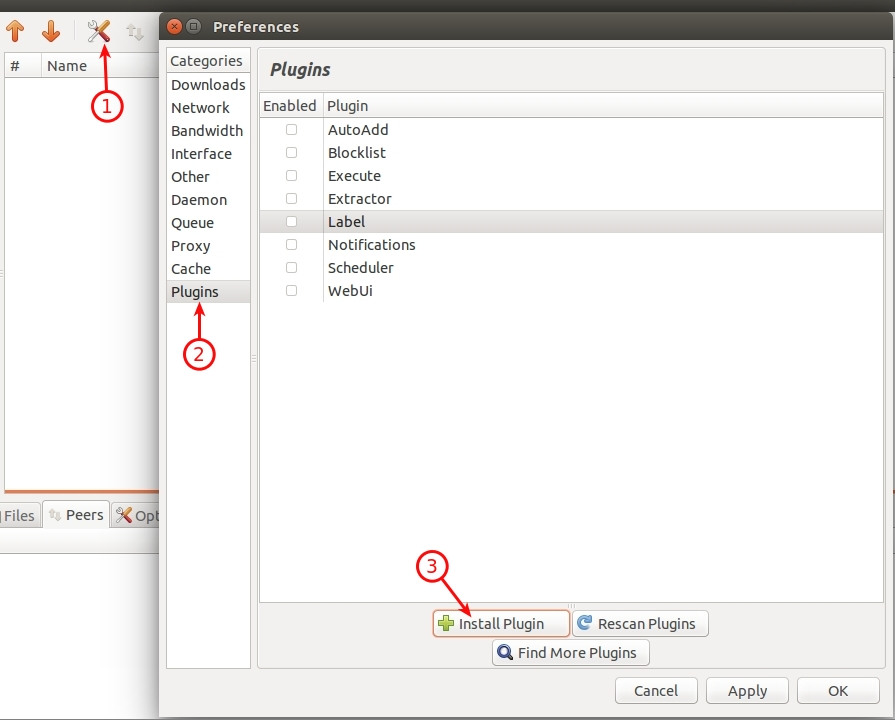
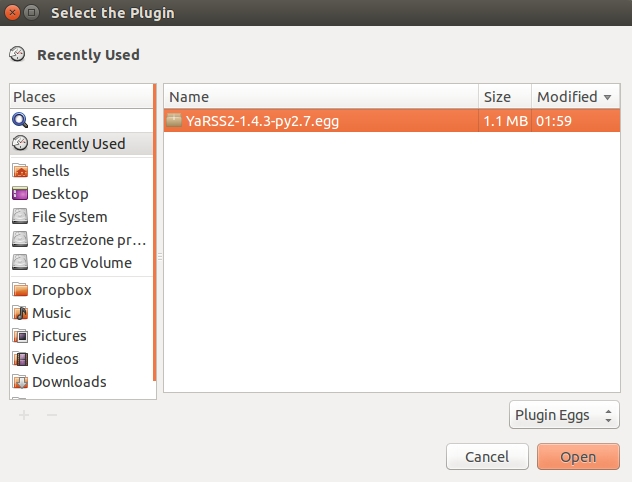
Select the downloaded .egg file from your computer and click Open.
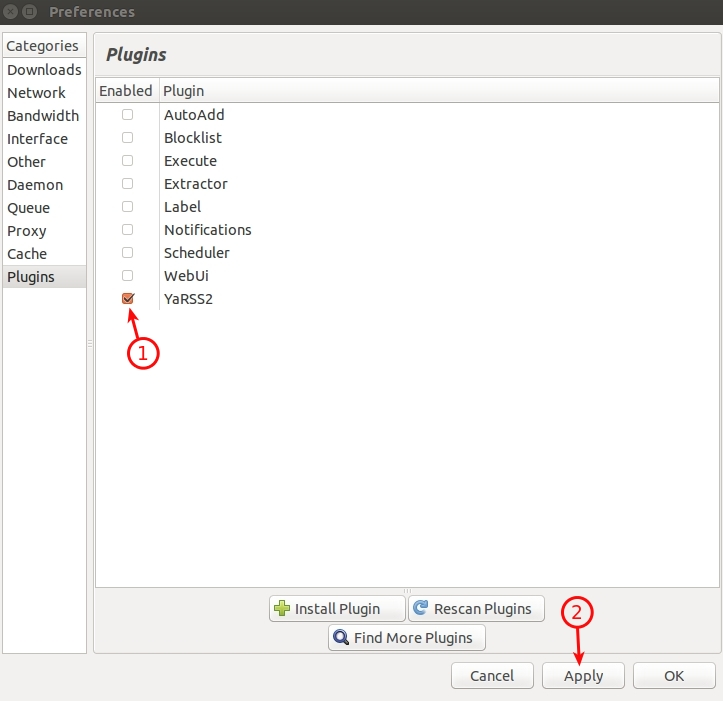
Enable the newly installed plugin and click Apply.
Step 3 – Install the Plugin Locally (If Required)
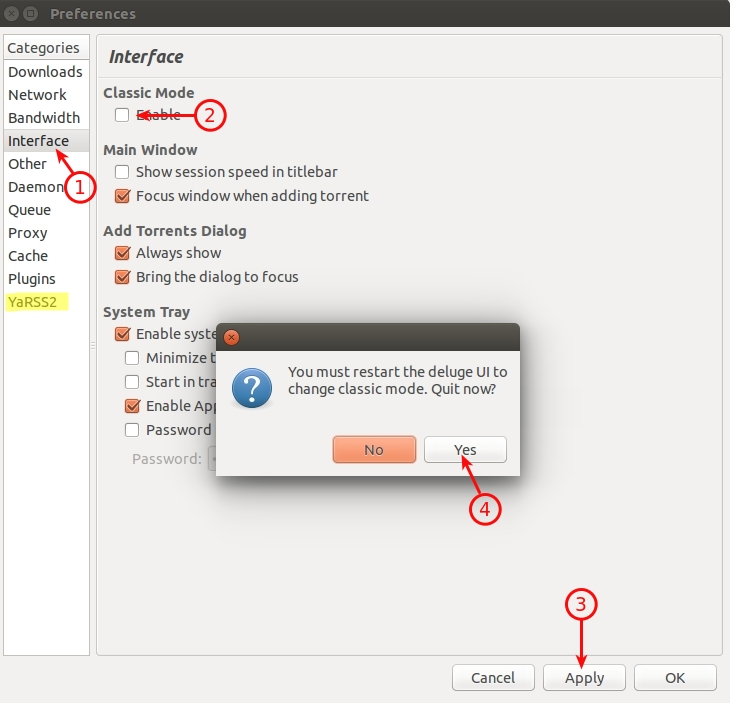
If the plugin does not appear in the left-hand menu after enabling it, it also needs to be installed in your local Deluge client.
Enable Classic Mode.
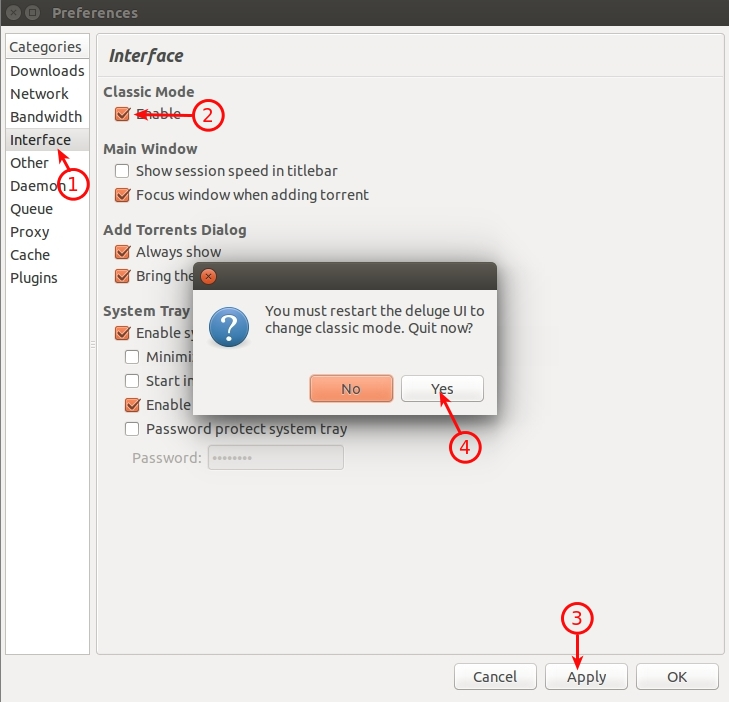
When Deluge restarts, install the same plugin locally using the same procedure as described above.
Once the plugin appears in the left-hand menu, disable Classic Mode and reconnect using the Deluge Thin Client.
The plugin should now also be available in your remote Deluge instance.
Notes
- Most Deluge plugins can only be installed using the Deluge Thin Client.
- Always download a plugin that matches the Python version installed on your service.
- If the plugin is not visible after installation, install the same plugin locally while Classic Mode is enabled.
