

How to Reinstall a Dedicated Server Using the Automated Installer
This guide explains how to reinstall the operating system on your Dedicated Server using the automated installer available in the Client Area.
Reinstalling the operating system will remove the current data from the server. Before starting the installation, make sure you have a backup of all important files, databases and configuration.
Open the Reinstall OS Option
To start the reinstall process:
- Log in to the Client Area.
- Go to My Services.
- Open the Dedicated Server you want to reinstall.
- Click View Details.
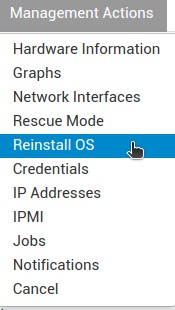
- Open Management Actions.
- Choose Reinstall OS.

Confirm OS Reinstallation
First, you need to confirm that you want to reinstall the operating system.

After the installation starts, the current operating system and data may be removed. This action cannot be safely reverted without your own backup.
Configure OS Installation
After confirming the reinstall, the OS installation form will be displayed.
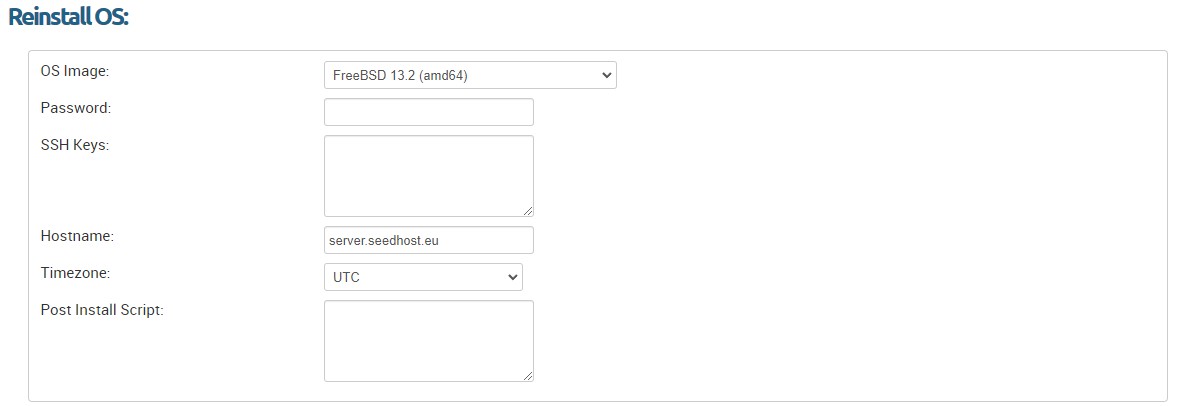
Configure the following options:
- OS Image – select the operating system you want to install.
- Password – enter your preferred root or administrator password, or leave it empty to generate one automatically.
- SSH Keys – add your SSH public keys if you want them installed automatically, or leave this field empty.
- Hostname – enter the hostname for your server.
Post Install Script
You can optionally provide a post-install script.
The script is saved as an executable file and executed as root after the operating system installation is completed.

Post-install script notes:
- For Linux and FreeBSD, the script must start with a shebang line, for example #!/bin/bash.
- Script logs for Linux and FreeBSD are saved to:
/var/log/lsw-postinstall.txt
- For Windows, the post-install script is executed with PowerShell as Administrator.
The post-install script field can be left empty if you do not need to run any custom commands after installation.
Software RAID Configuration
The automated installer can configure Software RAID during OS installation.
Software RAID can be used for redundancy, performance improvement or combining multiple disks, depending on the selected RAID level.
RAID is not a backup. RAID can protect against some disk failures depending on the RAID level, but it does not protect against accidental deletion, filesystem corruption, software problems or multiple disk failures.
The following software RAID levels are supported:
- CentOS: RAID 0, 1, 5, 10
- AlmaLinux: RAID 0, 1, 5, 10
- Debian: RAID 0, 1, 5, 10
- Ubuntu: RAID 0, 1, 5, 10
- Rocky Linux: RAID 0, 1, 5, 10
- FreeBSD: no software RAID option in the automated installer
- Windows Server: no software RAID option in the automated installer
Configure the RAID options:
- RAID Type – choose Software.
- RAID Level – select the RAID level you want to use.
- Number of Disks – select how many disks should be used for the selected RAID level.
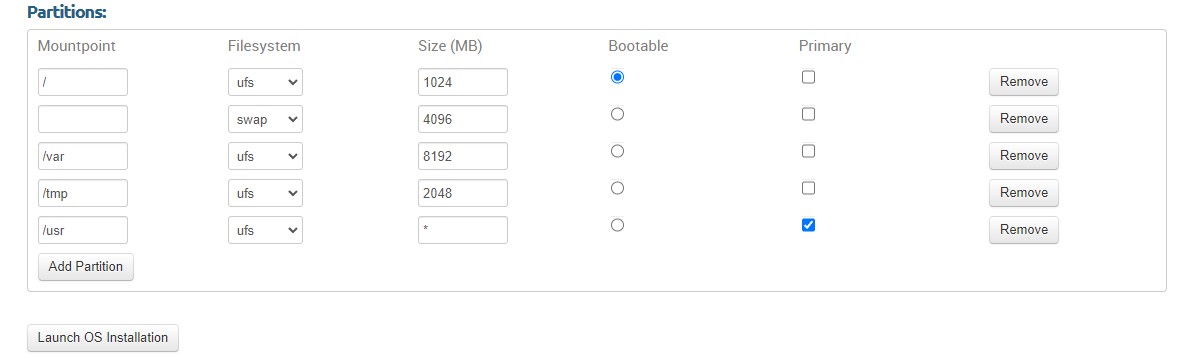
RAID0 provides no redundancy. If one disk in a RAID0 array fails, all data on the RAID0 array will be lost. Use RAID0 only if you understand the risk and keep your own backups.
Partition Configuration
In the partition section, you can configure the disk layout used by the operating system.
Available partition options include:
- Mountpoint – select where the partition should be mounted, for example /, /boot or /home.
- Filesystem – select the filesystem type. Available options may depend on the selected operating system.
- Size (MB) – enter the partition size in MB.
You can use:
*
as the size for the last partition to assign all remaining available space to it.
We recommend using * for the last partition so that all remaining disk space is assigned automatically.
Start the Installation
After selecting the OS image, RAID options and partition layout, click:
Launch OS Installation
The automated installer will start reinstalling the server.
The installation time depends on the selected operating system, disk layout and server configuration.
Do not reboot the server manually while the installation is running unless instructed by support. Interrupting the installation may leave the server in an unusable state.
Example Partition Layouts
Below you can find example partition layouts for common installation scenarios.
FreeBSD Default Partitioning Layout
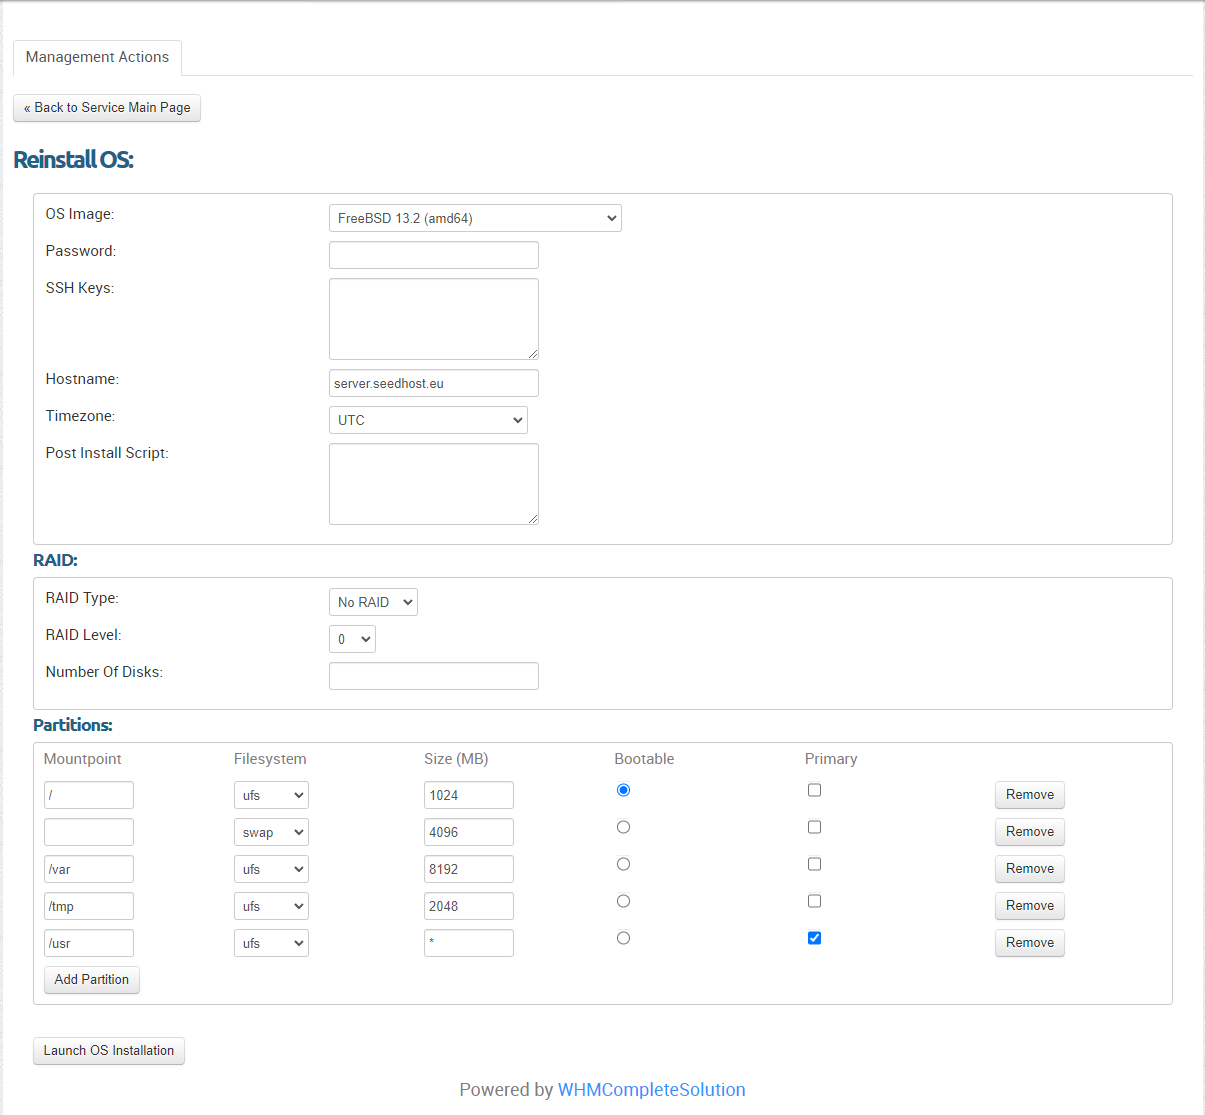
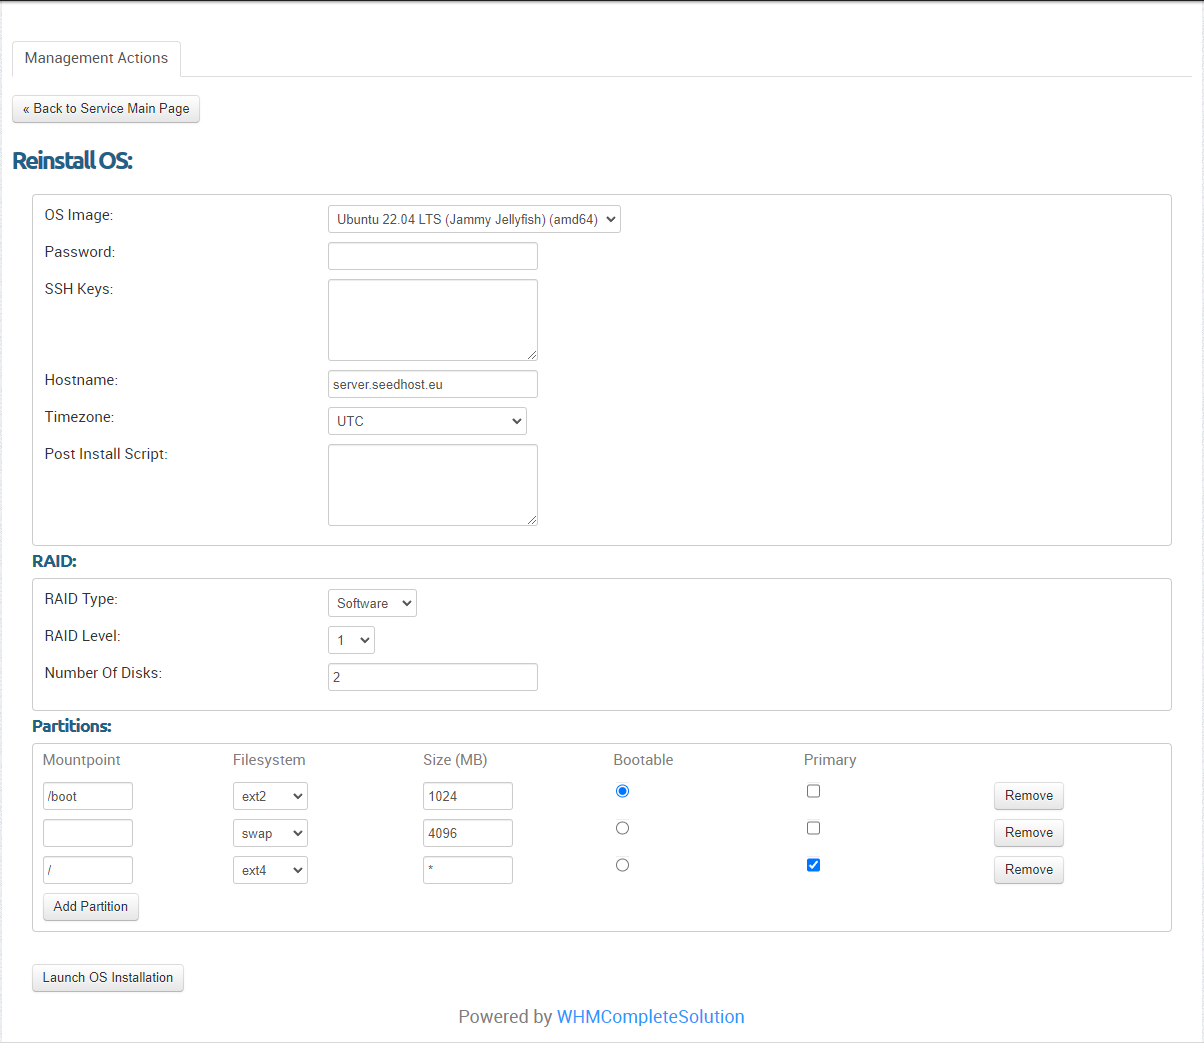
Linux Software RAID1 with 2 HDDs, Everything in /
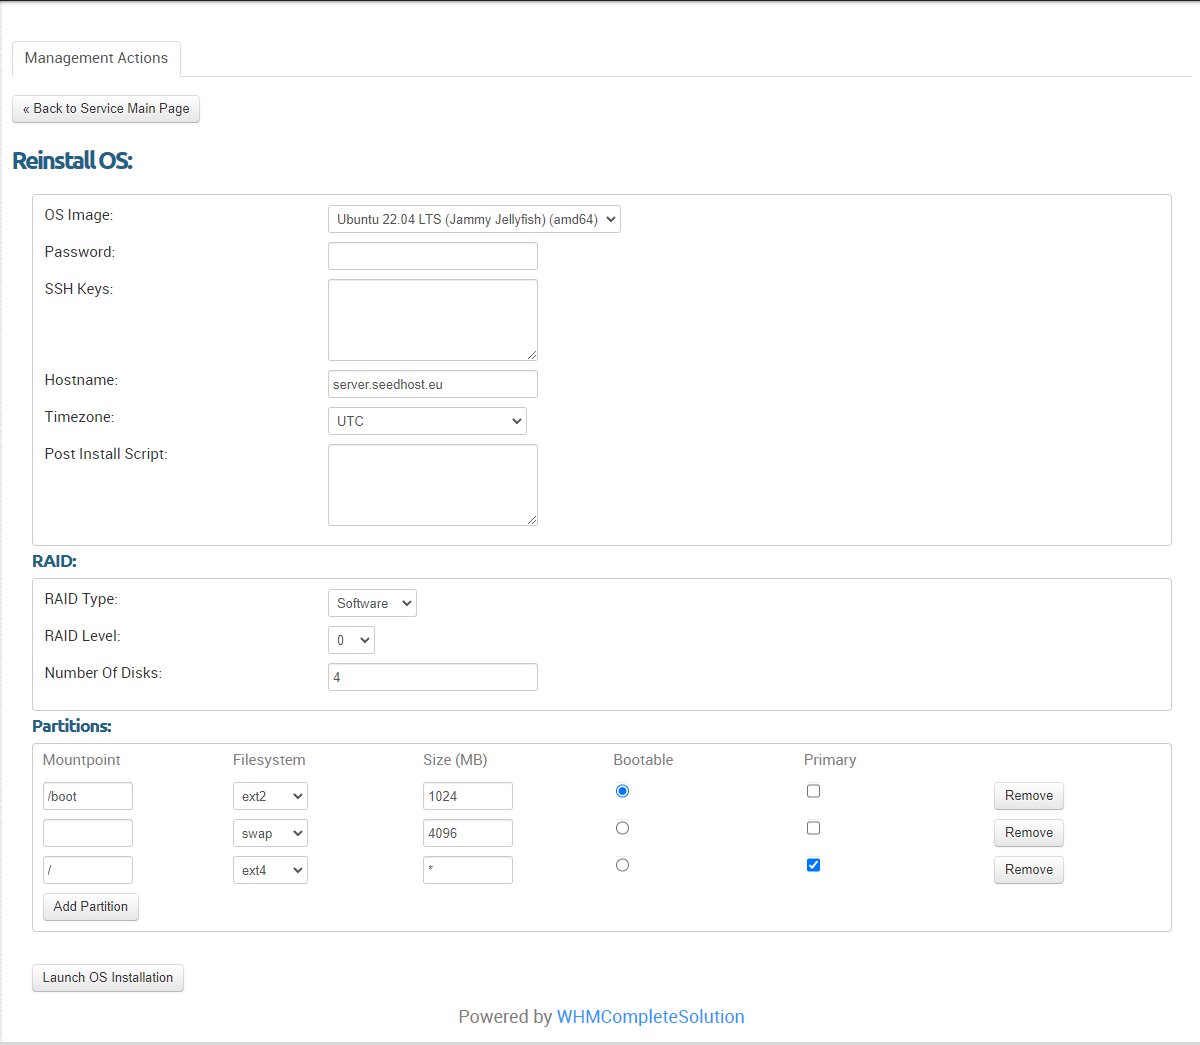
Linux Software RAID0 with 4 HDDs, Everything in /
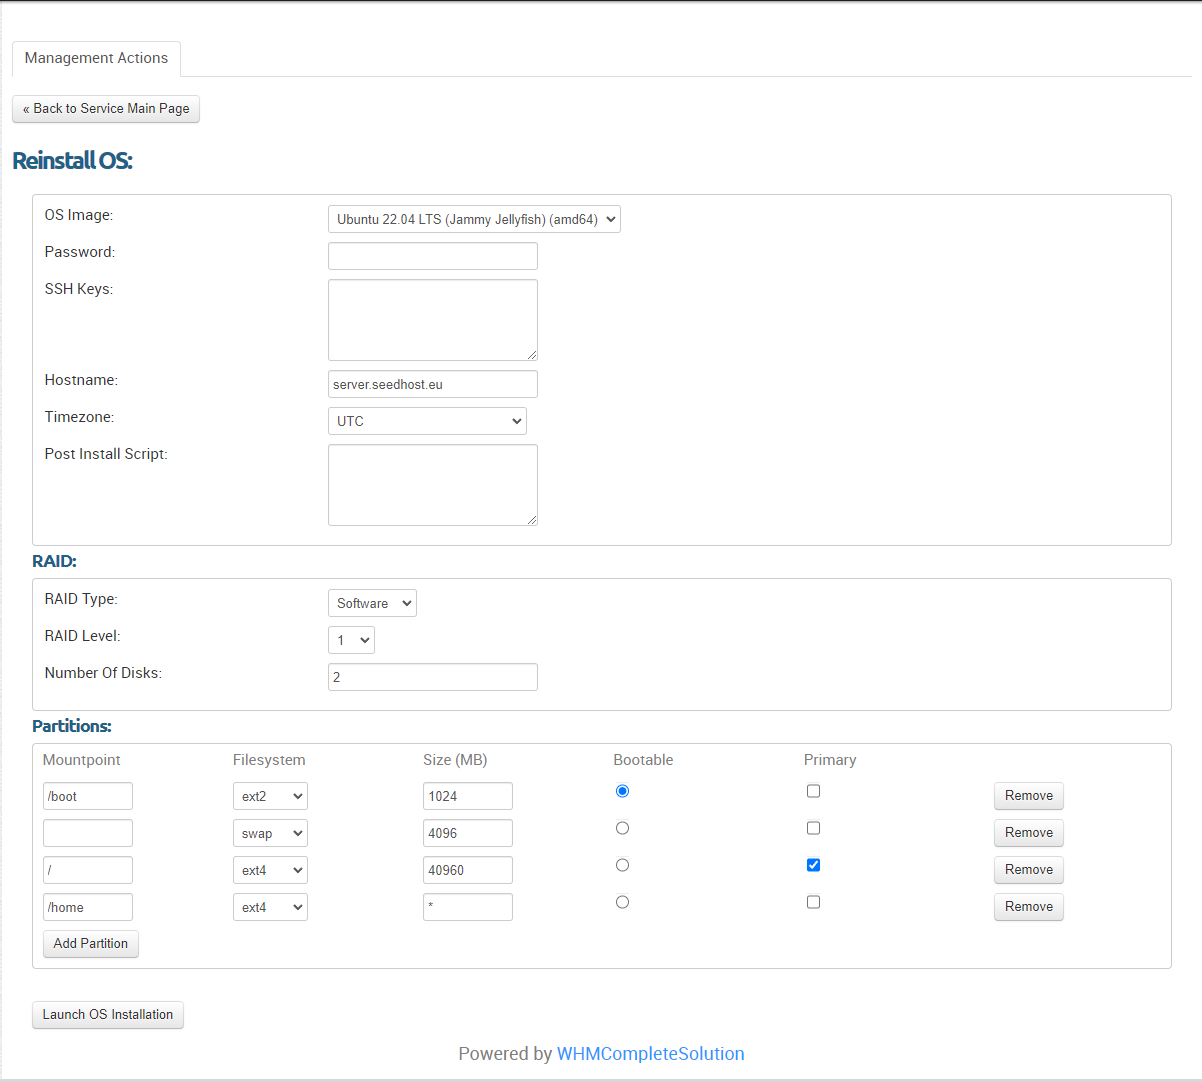
Linux Software RAID1 with 2 HDDs and Separate /home Partition
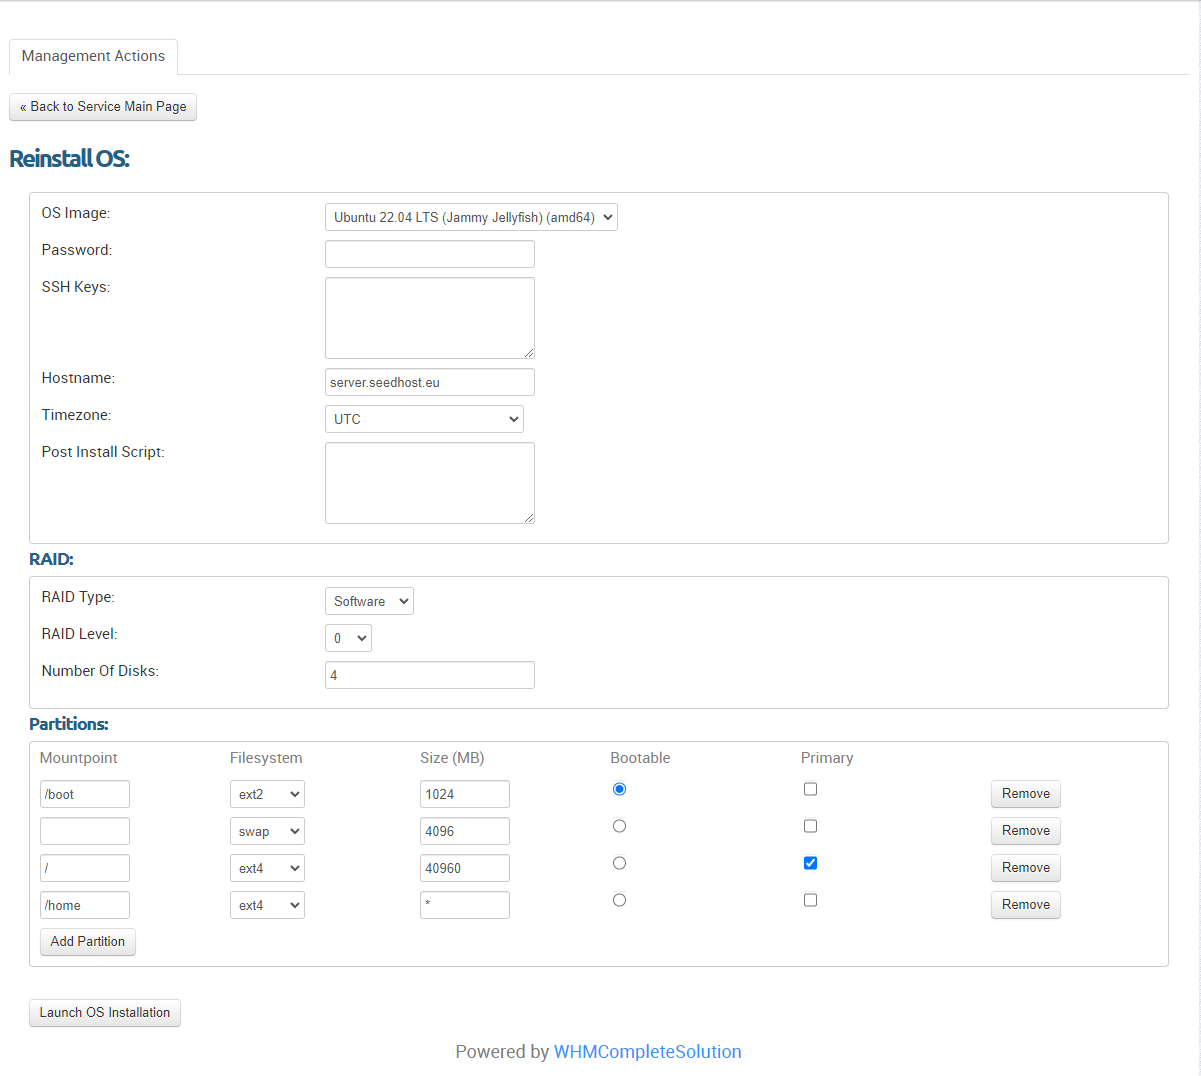
Linux Software RAID0 with 4 HDDs and Separate /home Partition
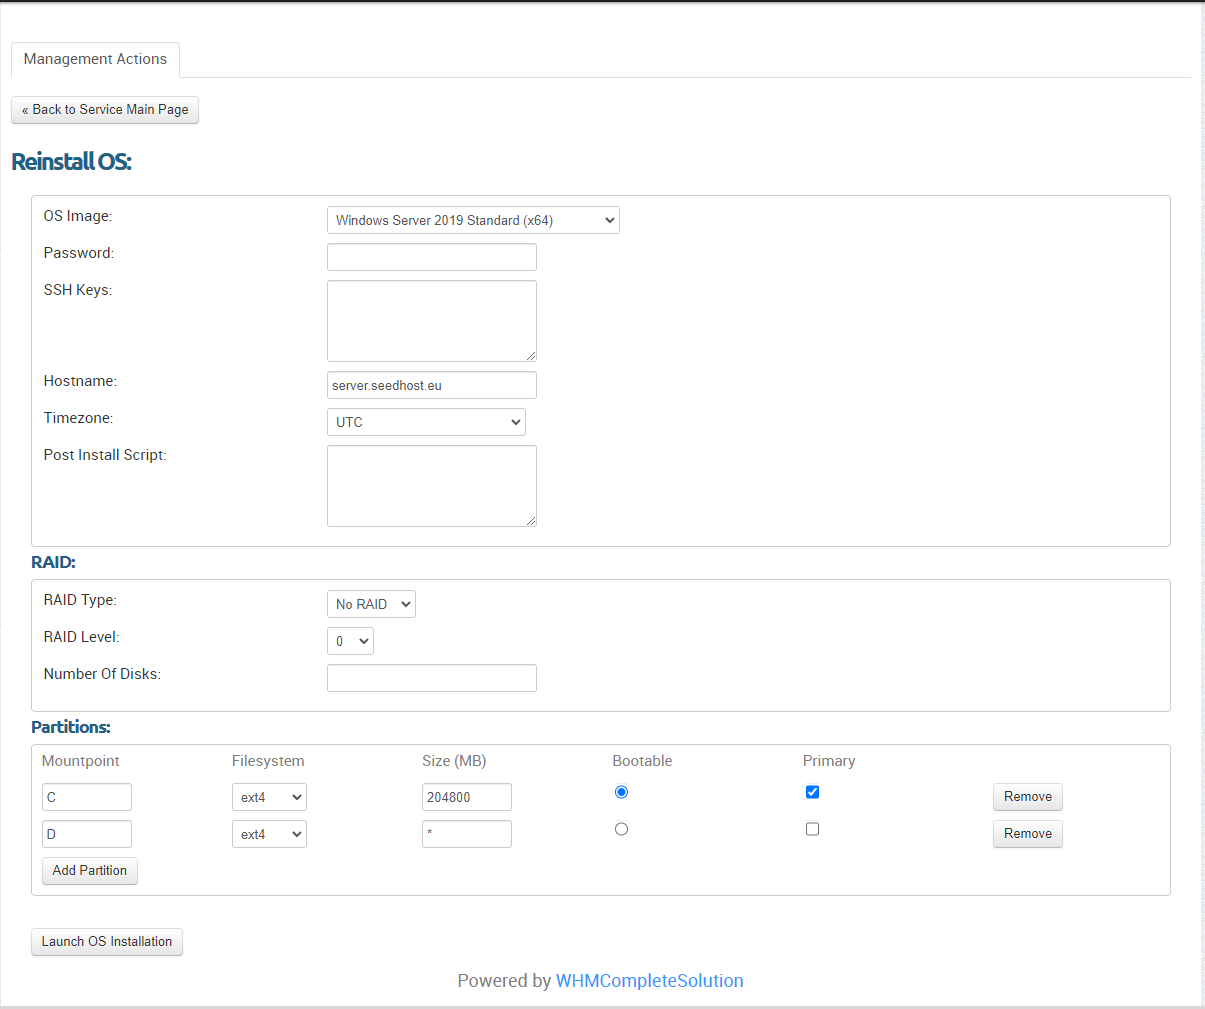
Windows Server Partitioning Layout
After Installation
When the installation is completed, the new server login details will be available in the Client Area.
You can then connect to the server using SSH or RDP, depending on the installed operating system.
If you entered your own password during the reinstall, use that password. If the password field was left empty, use the generated password shown in the Client Area.
Verification
If the server boots into the selected operating system and you can log in with the new credentials, the OS reinstall has been completed successfully.
If the server does not boot after reinstall or you cannot log in with the new credentials, please open a support ticket and include the selected OS image, RAID level and partition layout used during installation.
