

This guide explains how to configure your web browser to use an existing SSH tunnel.
An SSH tunnel allows you to securely route your browser traffic through your SeedHost service. This can be useful when accessing websites from your server's IP address, bypassing local network restrictions or encrypting your browser traffic while using untrusted networks.
Before following this guide, make sure you have already created an SSH tunnel and connected to it. If the SSH tunnel is not active, your browser will not be able to use the proxy.
Firefox
Open Firefox Settings.
Go to Advanced (1) → Network (2) → Settings (3).
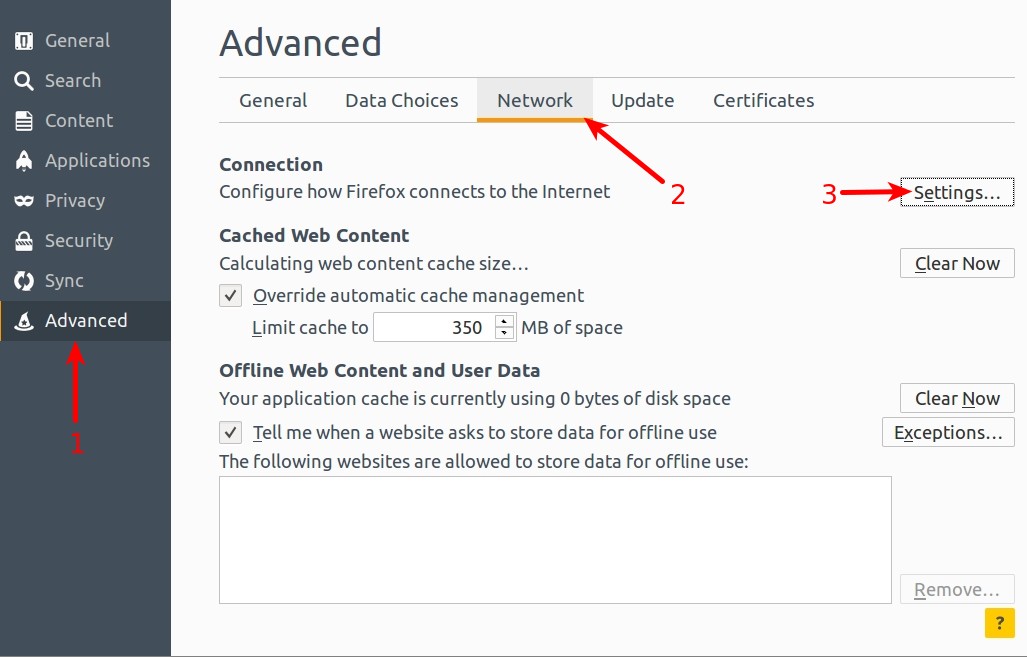
Firefox Connection Settings will open.
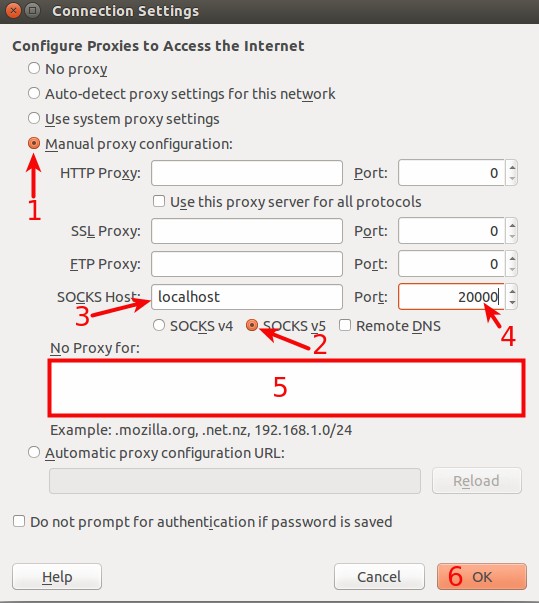
- Select Manual proxy configuration.
- Select SOCKS v5.
- Enter localhost as the SOCKS Host.
- Enter your SSH tunnel port. In this example, we use 20000.
- Clear the No Proxy for field so it is empty.
- Click OK.
Chrome
Google Chrome does not provide its own SOCKS proxy configuration, so you need to install a browser extension such as SwitchyOmega.
Install the extension, then open the SwitchyOmega settings.
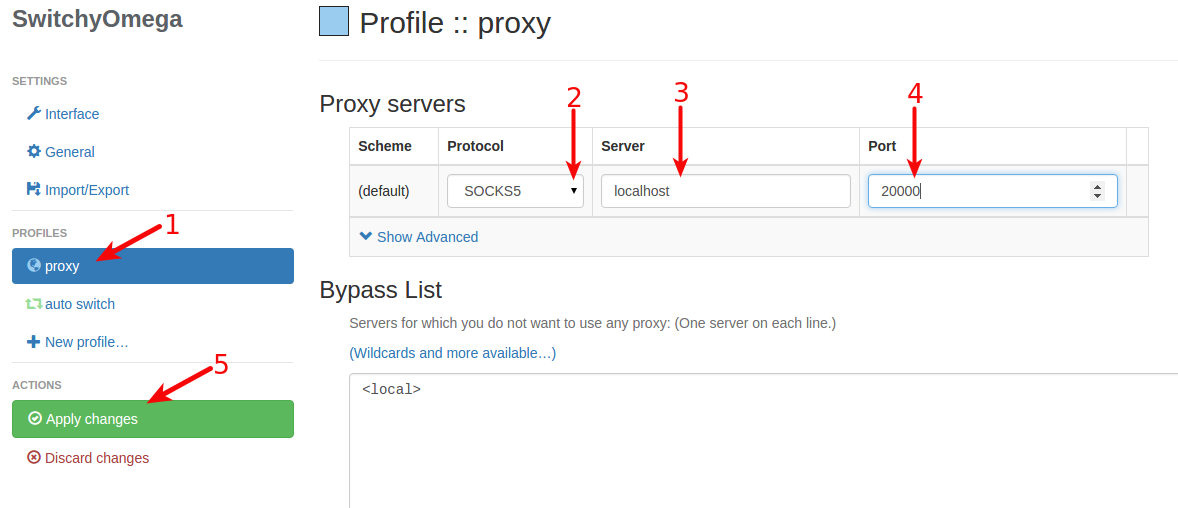
- Open the proxy profile.
- Select SOCKS5 as the protocol.
- Enter localhost as the server.
- Enter your SSH tunnel port.
- Click Apply changes.
To enable the proxy, click the SwitchyOmega icon in the top-right corner of Chrome and select your proxy profile.
To disable the proxy, click the SwitchyOmega icon again and select Direct connection.
Notes
- The SSH tunnel must remain connected while using the proxy.
- Replace the example port (20000) with the local port used when creating your SSH tunnel.
- When the SSH tunnel is disconnected, browser traffic will no longer be routed through your service.
