

Mount Your Service as a Local Filesystem
This guide explains how to mount your service using either SSHFS or WebDAV on Linux, macOS and Windows.
Your service hostname, WebDAV URL, service username and service password can be found in the Client Area under your service details.
Linux
This guide is based on Ubuntu, but the same steps are very similar on most Linux distributions.
SSHFS
Install the sshfs package:
sudo apt update
sudo apt -y install sshfs
Create a directory where your app package will be mounted. In this example, it will be created inside your home directory:
mkdir -p ~/sshfs
Mount your app package into the ~/sshfs directory:
sshfs -o uid=$(id -u) -o gid=$(id -g) -o default_permissions user@server.host: ~/sshfs
Replace:
- user with your service username.
- server.host with your service hostname.
To unmount it, run:
umount sshfs
WebDAV
Before using WebDAV, make sure it is enabled on your service by following our WebDAV setup guide.
Install the davfs2 package:
sudo apt update
sudo apt -y install davfs2
During installation, allow non-root users to mount WebDAV as shown below.
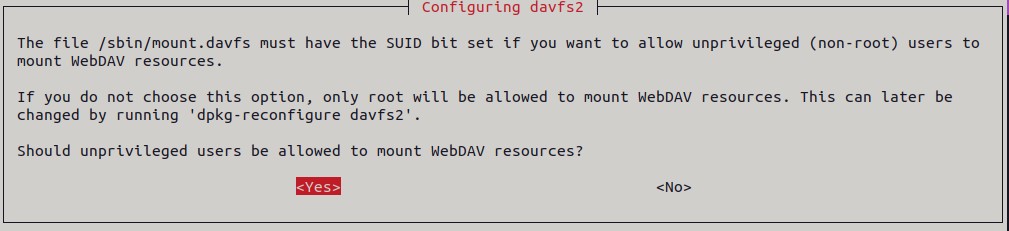
If you skipped this step during installation, you can reconfigure it later with:
sudo dpkg-reconfigure davfs2
Create a directory where your WebDAV share will be mounted:
mkdir -p ~/webdav
Add your user (example: myuser) to the davfs2 group:
sudo usermod -aG davfs2 myuser
You now need to reboot your machine or log out and back in. Alternatively, reload your session with:
su - $USER
Add the following entry to your /etc/fstab file:
https://WebDAVURL /mount/path/ davfs noauto,user,rw 0 1
Example:
https://server1054.seedhost.eu/username/webdav /home/myuser/webdav davfs noauto,user,rw 0 1
Open ~/.davfs2/secrets and add the following line at the end of the file:
webdav_url webdavusername webdavpassword
Example:
https://server1054.seedhost.eu/username/webdav user password
Set the correct permissions for the secrets file:
chmod 600 ~/.davfs2/secrets
Mount your WebDAV share:
mount webdav
If everything is configured correctly, you should now be able to access your mounted files:
ls -la ~/webdav
To unmount the share, run:
umount webdav
macOS
SSHFS
Download and install the required macFUSE and SSHFS packages as an administrator.
Open Terminal and create a directory where your app package will be mounted:
mkdir -p ~/sshfs
Mount your app package into the directory you created:
sshfs user@server.host: ~/sshfs
Replace:
- user with your service username.
- server.host with your service hostname.
To unmount it, run:
umount sshfs
WebDAV
Before using WebDAV, make sure it is enabled on your service by following our WebDAV setup guide.
Open Finder → Go → Connect to Server.
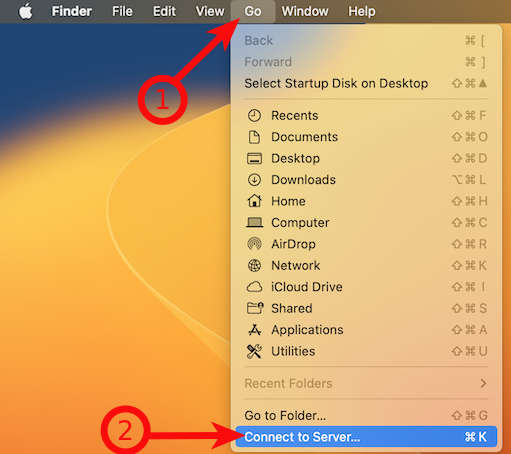
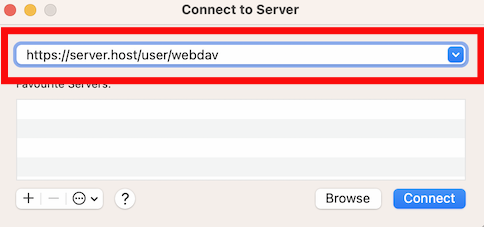
Enter your WebDAV URL and click Connect.
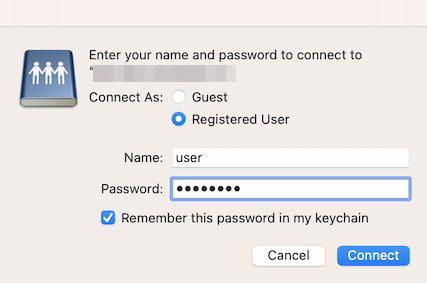
Select Registered User, enter your WebDAV username and password, then click Connect.
You can now access your files through Finder.
Windows 10/11
SSHFS
To use SSHFS on Windows, first install the following packages:
Alternatively, install them using Windows PowerShell:
winget install -e --id "WinFsp.WinFsp"
winget install -e --id "SSHFS-Win.SSHFS-Win"
Open Windows Explorer, right-click This PC and select Map network drive.
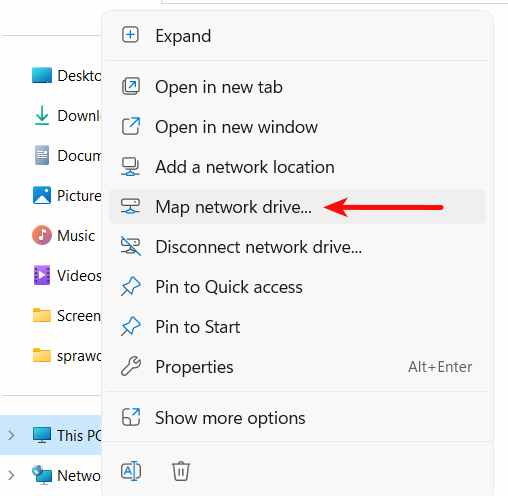
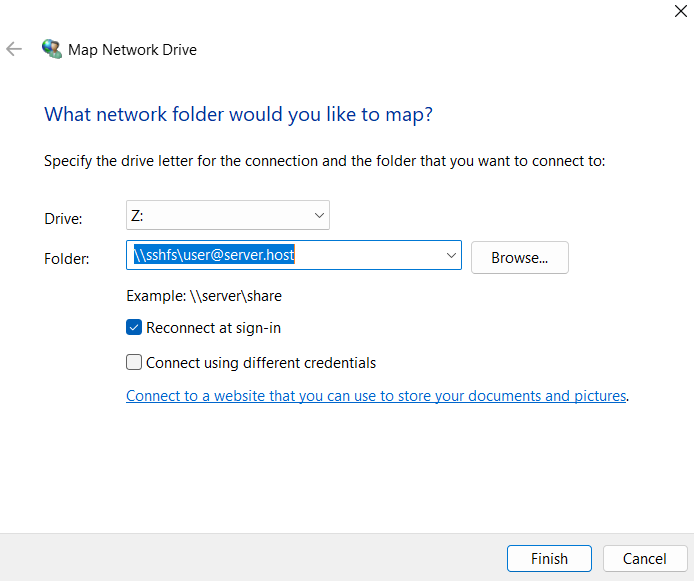
In the Folder field, enter:
\\sshfs\user@server.host
Replace user with your service username and server.host with your service hostname.
Click Finish.
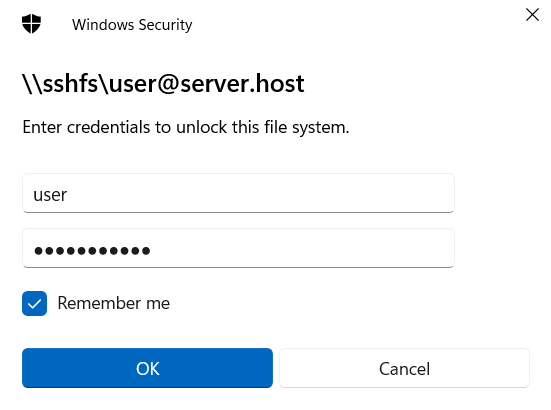
You will be prompted for your password. Enter it and click OK. To save your credentials, enable Remember me.
After the share has been mounted, it will appear under Windows Explorer → This PC → Network locations.
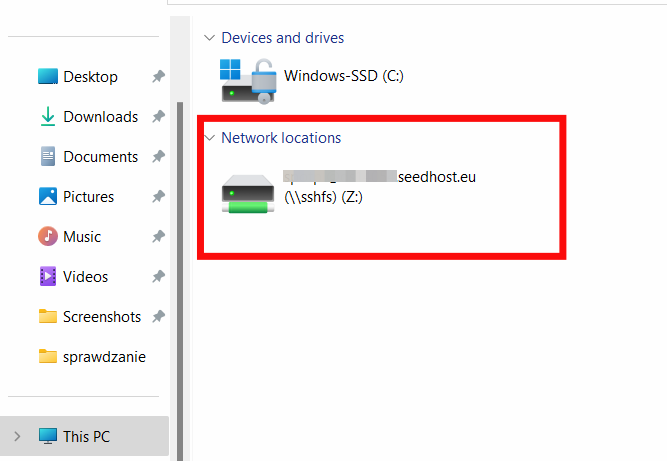
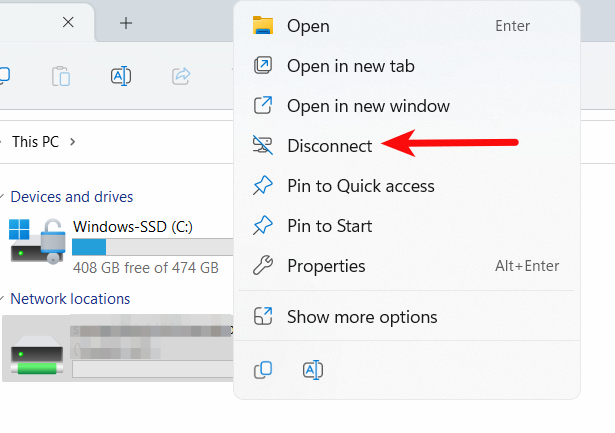
To unmount it, right-click the mounted drive and select Disconnect.
WebDAV
Before using WebDAV, make sure it is enabled on your service by following our WebDAV setup guide.
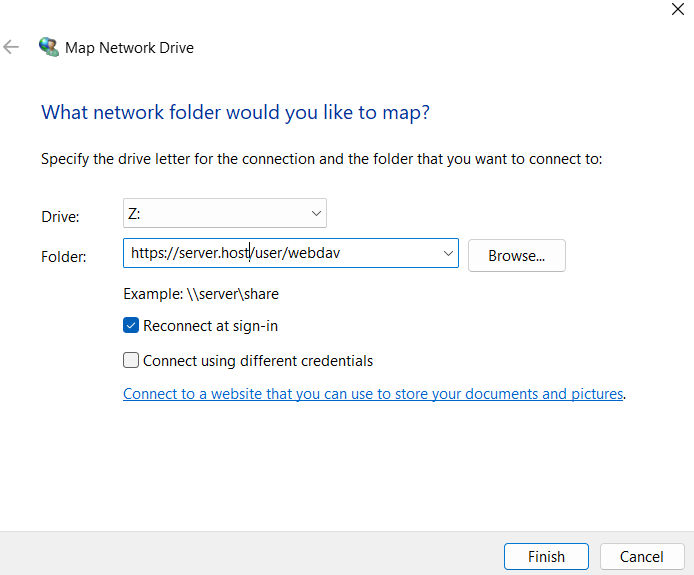
Open Windows Explorer, right-click This PC and select Map network drive. In the Folder field, enter your WebDAV URL and click Finish.
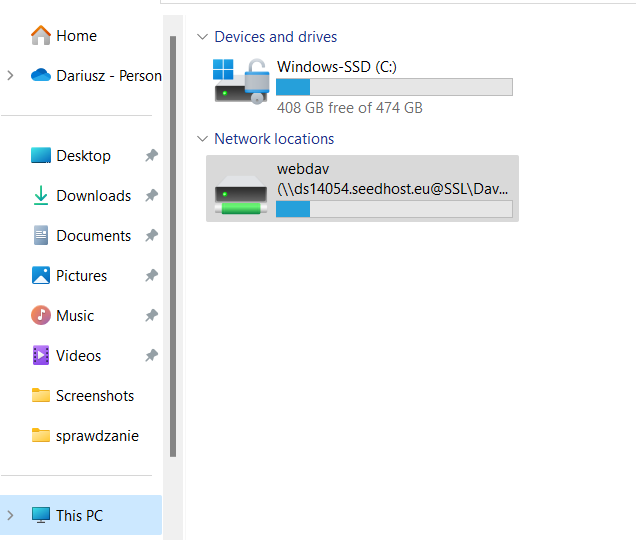
After the share has been mounted, it will appear under Windows Explorer → This PC → Network locations.
To unmount it, right-click the mounted drive and select Disconnect.
Verification
Before connecting, make sure SSHFS or WebDAV is installed correctly and verify that your service hostname, WebDAV URL, username and password are entered correctly.
If the share mounts successfully, you can access your files using your operating system's file manager just like any local folder.
