

How to Configure Pydio
This guide explains how to complete the basic configuration of Pydio after installing it from the Client Area.
Pydio is a web-based file manager that allows you to manage your files directly from your browser.
Install Pydio first from the Apps tab on your service details page in the Client Area. After installation, you will receive your Pydio URL.
Open the Pydio Setup Wizard
After Pydio is installed, open the Pydio URL provided in your service details.
The Pydio setup wizard will open.
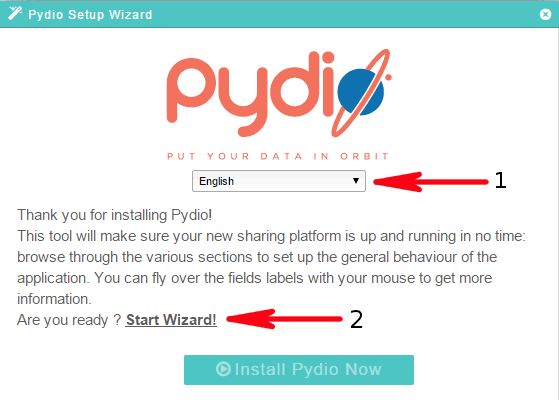
- Choose your preferred language.
- Click the Start Wizard! button.
Create the Administrator Account
In the next step, create your Pydio administrator account.
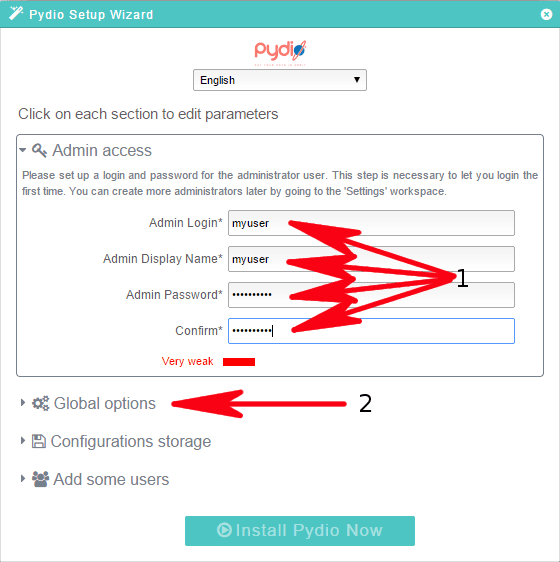
- Choose your administrator username.
- Enter your administrator name.
- Choose a secure administrator password.
- Click Global Options to continue.
Save your administrator username and password in a safe place. You will need these details to log in to Pydio later.
Configure Global Options
In this section, you can set the Pydio title, welcome message and default language.
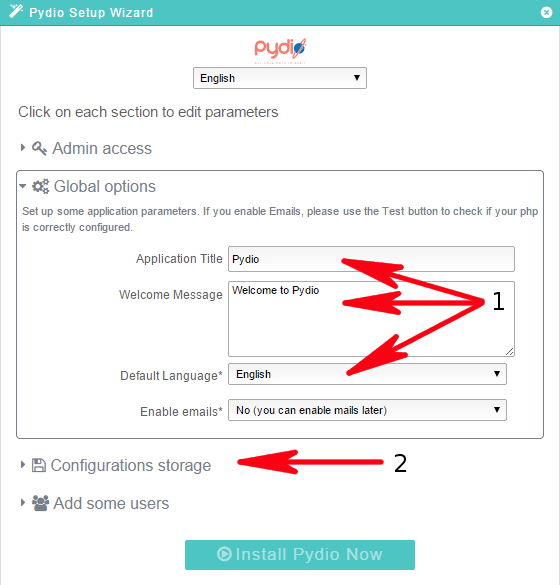
- Enter your preferred Pydio title.
- Enter a welcome message, if needed.
- Select the default language.
- Click Configurations Storage to continue.
These settings can be changed later, so you can also leave the default values.
Configure Storage and Database
In this step, configure the database storage settings as shown in the screenshot.
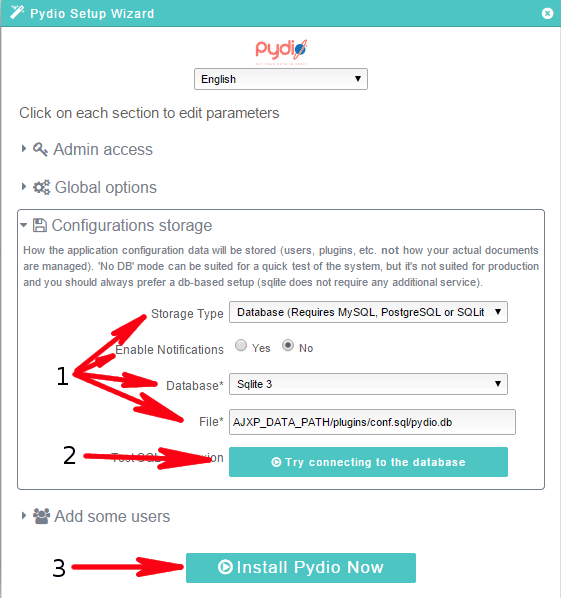
- Choose the database/storage options as shown in the screenshot.
- Click Try connecting to the database to test the configuration.
- If the connection test is successful, click Install Pydio Now.
If the database connection test fails, check the configuration again and make sure all options match the screenshot.
Pydio will now start the installation process.
Log in to Pydio
After installation is complete, log in to Pydio using the administrator username and password you created earlier.
After logging in, you need to complete the final configuration so that all Pydio features work correctly.
Open Pydio Settings
After logging in, open the settings menu.
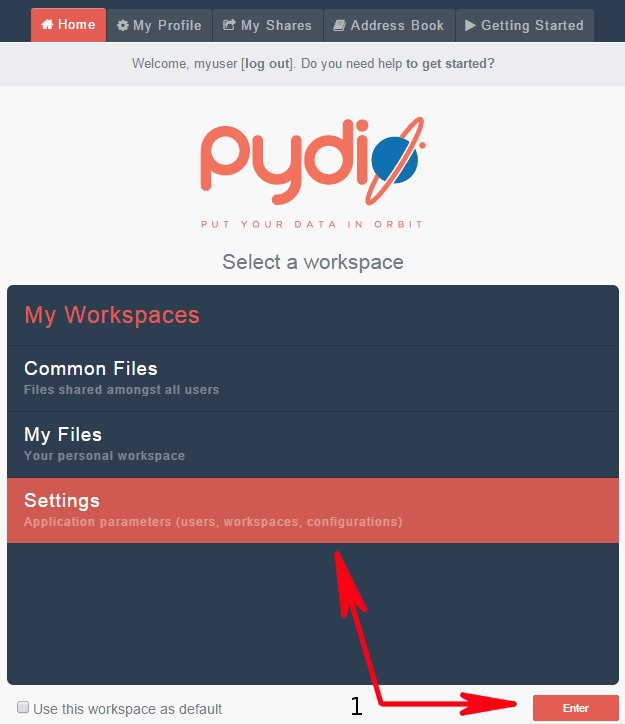
- Choose Settings.
- Press Enter or open the settings section.
Create a New Workspace
In the settings area, create a new workspace for your files.
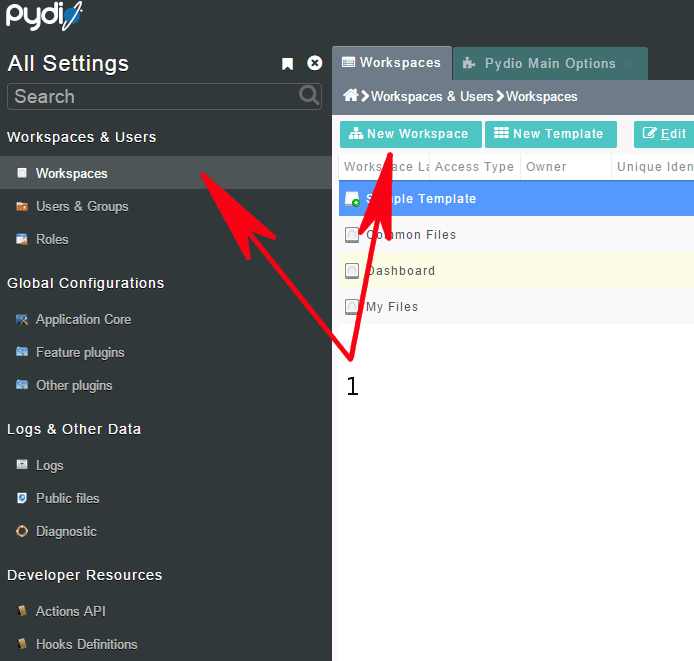
- From the left menu, choose Workspaces.
- Click the New Workspace button.
Configure Workspace Details
Now configure the new workspace.
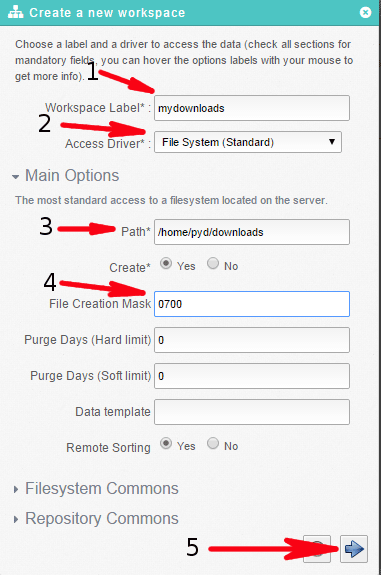
- Workspace label – enter any name you want.
- Access driver – choose the option shown in the screenshot.
- Path – enter the path to your downloads directory.
- File creation mask – set it to 0700.
- Click Next.
You can find your downloads path in ruTorrent under the General tab of any torrent.
Configure Pydio Main Options
Next, open the main Pydio options.
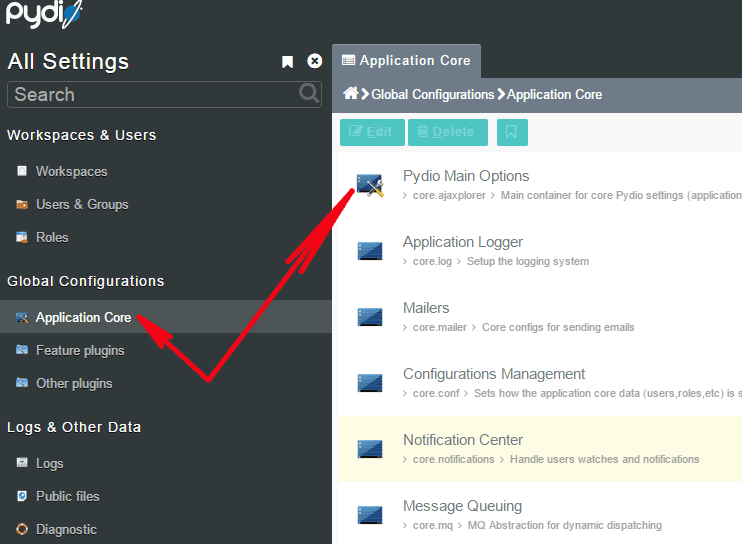
- From the left menu, click Application Core.
- On the right side, open Pydio Main Options.
Set the Pydio URL
In the Pydio main options, set your Pydio URL.
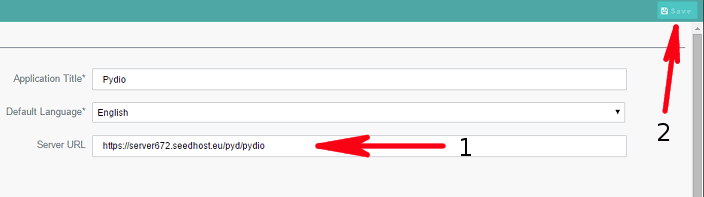
- Enter your Pydio URL. You can find it in the Client Area on your service details page.
- Click the Save button.
Verification
If you can log in to Pydio, access your workspace and see your files, Pydio has been configured successfully.
If you cannot access your files or the workspace path is incorrect, check the workspace path again and make sure it points to the correct downloads directory.
