

This guide explains how to configure the ZNC IRC bouncer.
After logging in to the ZNC WebUI, open Global Settings. First, configure the listening port that your IRC client will use to connect to ZNC.
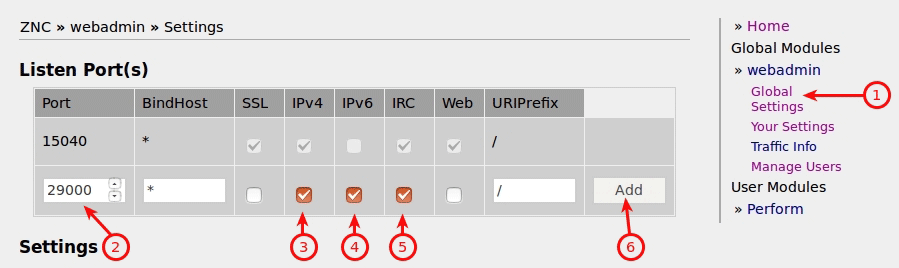
Port – choose any random port between 29000 and 30000.
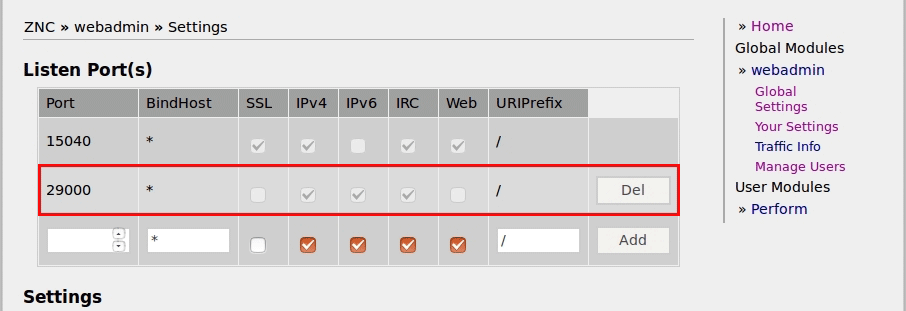
After configuring the port, your settings should look similar to the example below.
Configure an IRC Network
Next, add the IRC server you want ZNC to connect to.
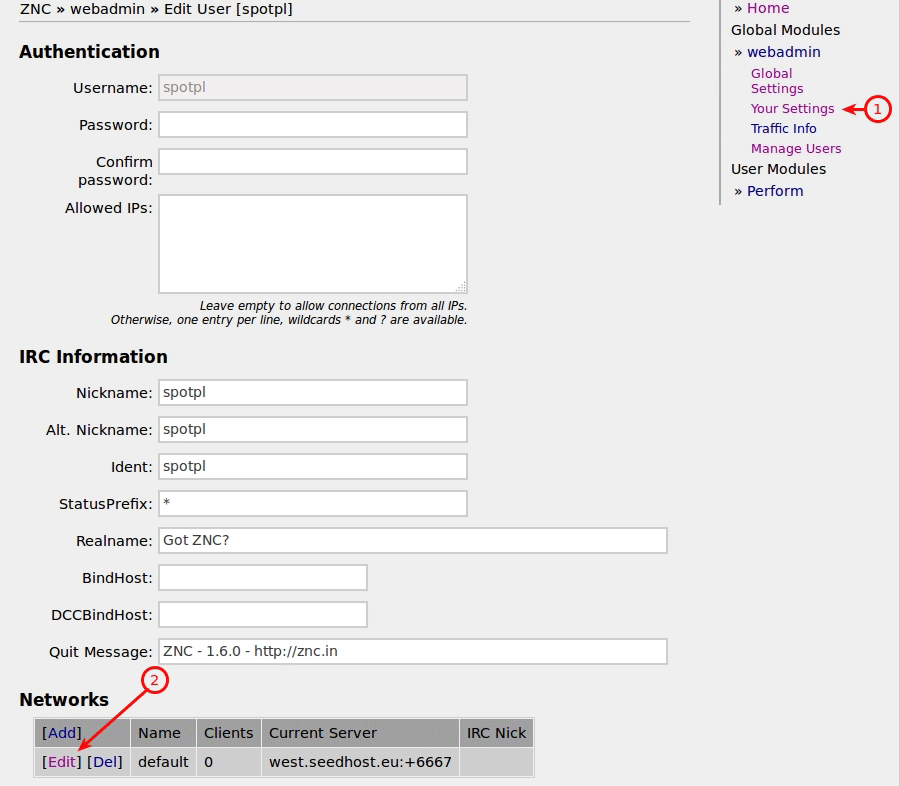
Go to Your Settings and edit the default network.
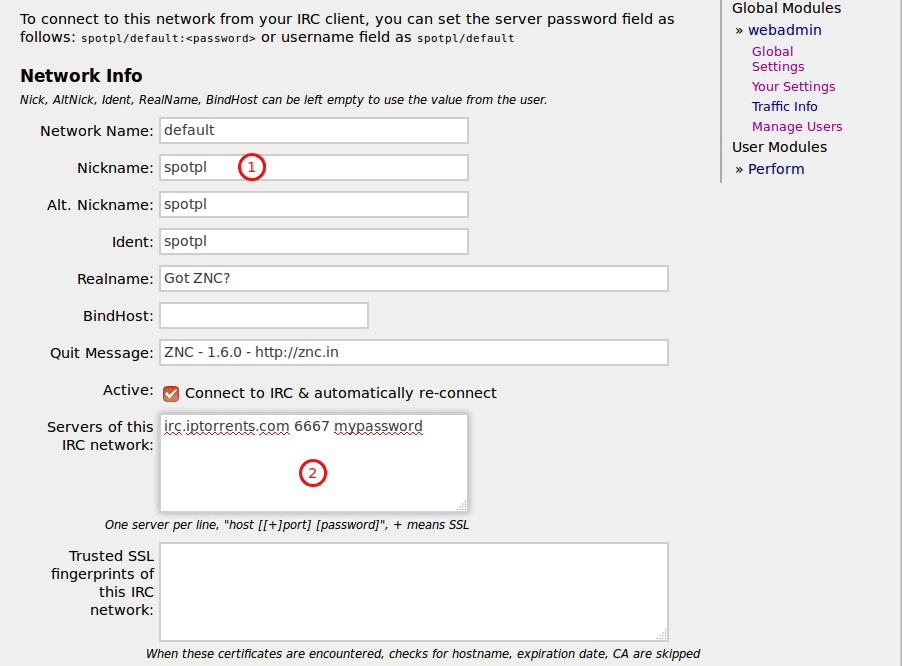
Configure the following fields:
- Nickname – your IRC nickname.
- IRC Server – use the following format:
hostname port password
Example:irc.iptorrents.com 6667 mypassword
If you want to use SSL, add a + before the port number:hostname +port password
Example:irc.iptorrents.com +6697 mypassword
Add IRC Channels
Scroll down to the Channels section and add the channels you want to join.

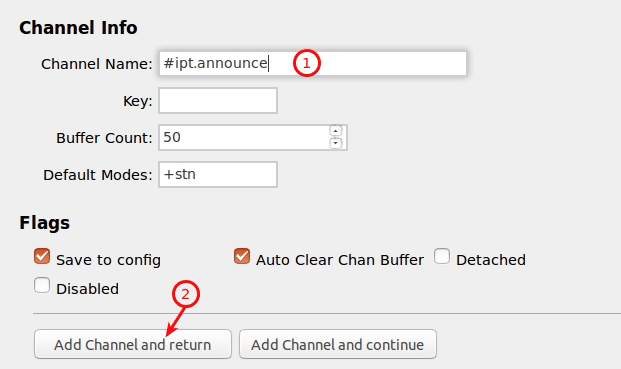
If you want to add more channels, click Add and configure each channel in the same way.
Connect Your IRC Client
Once the configuration is complete, ZNC will connect to the configured IRC server and channels.
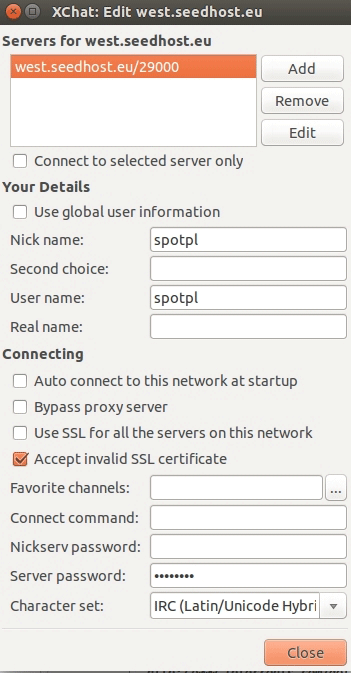
You can now connect your preferred IRC client to your ZNC instance.
The example below shows the configuration using XChat.
Notes
- Choose a listening port between 29000 and 30000.
- To connect using SSL, prefix the IRC server port with a +.
- You can add multiple IRC channels using the Add button.
- After the configuration is complete, connect to ZNC using your preferred IRC client.
