

Configure WireGuard
This guide explains how to configure WireGuard on your device.
Each service includes 3 WireGuard peer configurations, allowing you to connect up to 3 different devices simultaneously. Each device must use a different client configuration file.
The WireGuard configuration files and QR codes can be downloaded or generated from the Client Area under your service details.
Linux / Ubuntu
We use Ubuntu in this example, but the steps are similar on most Linux distributions.
Step 1 – Download the Configuration
Download one of the client configuration files to your device, for example client1.conf.
Step 2 – Install WireGuard
Install the required packages:
sudo apt install wireguard resolvconf
Step 3 – Move the Configuration File
Move the configuration file to the WireGuard configuration directory:
sudo mv ~/client1.conf /etc/wireguard/
Step 4 – Connect
Start WireGuard using the downloaded configuration:
sudo wg-quick up client1
Step 5 – Disconnect
To stop WireGuard, run:
sudo wg-quick down client1
macOS
Step 1 – Download the Configuration
Download one of the client configuration files to your device, for example client1.conf.
Step 2 – Install WireGuard
Install the WireGuard application from the App Store.
Step 3 – Start the Application
Launch the WireGuard application.
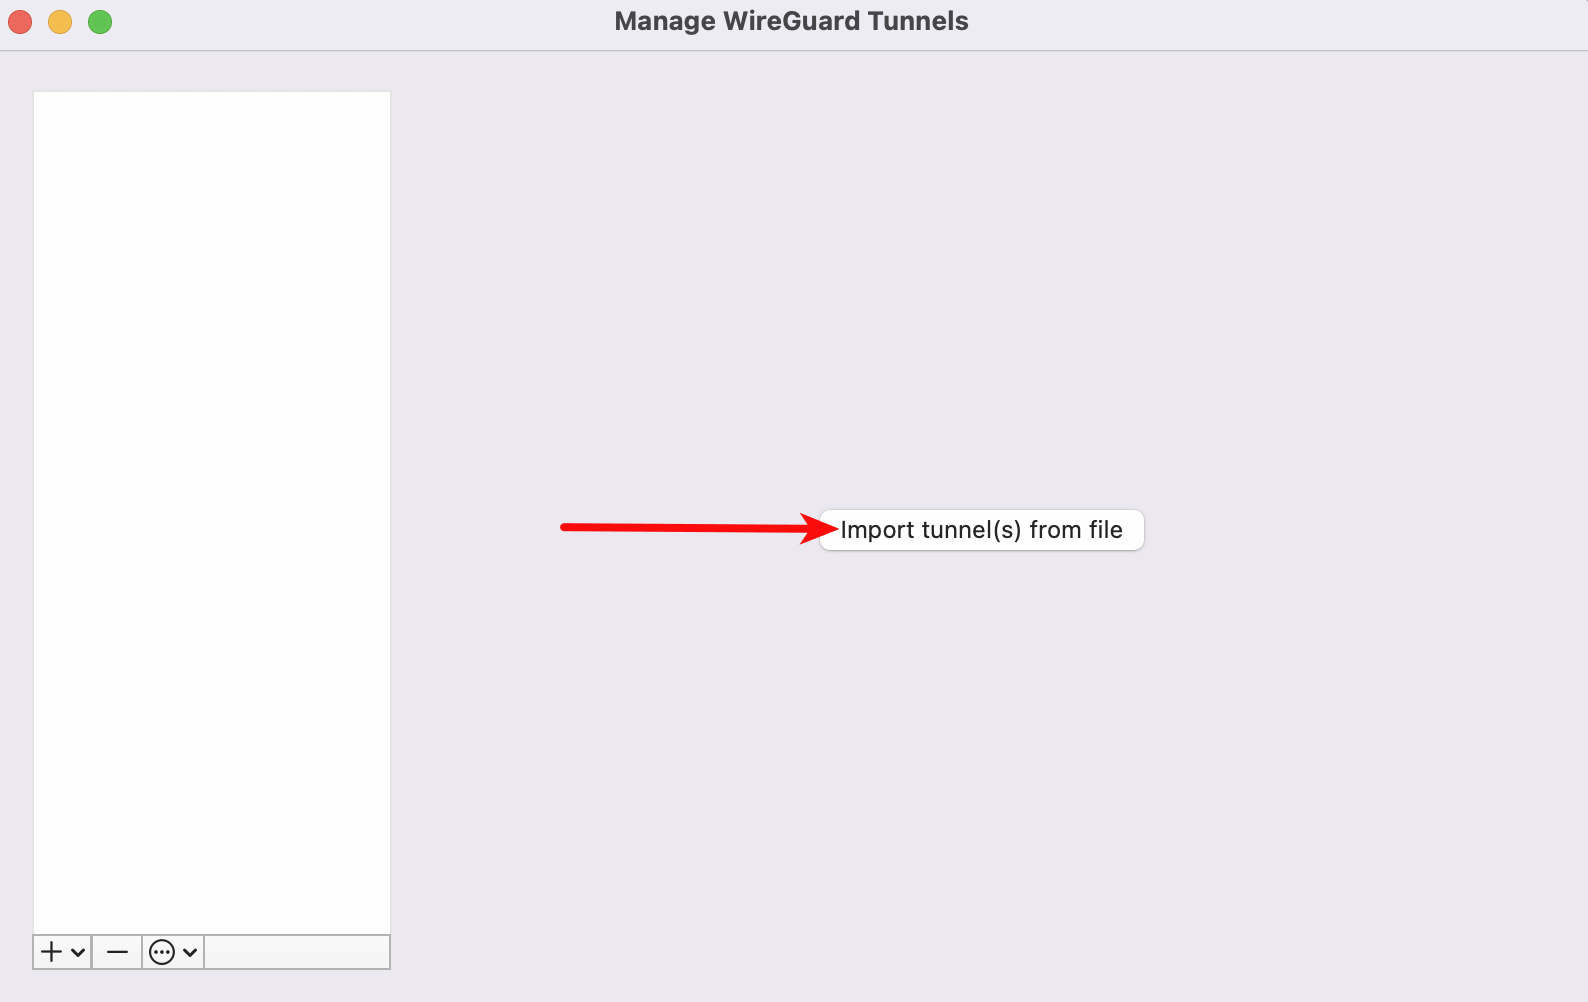
Step 4 – Import the Tunnel
Click Import tunnel(s) from file and select the downloaded client1.conf file.
Windows
Step 1 – Download the Configuration
Download one of the client configuration files to your device, for example client1.conf.
Step 2 – Install WireGuard
Download the WireGuard installer for Windows here.
Step 3 – Start WireGuard
Launch the WireGuard application.
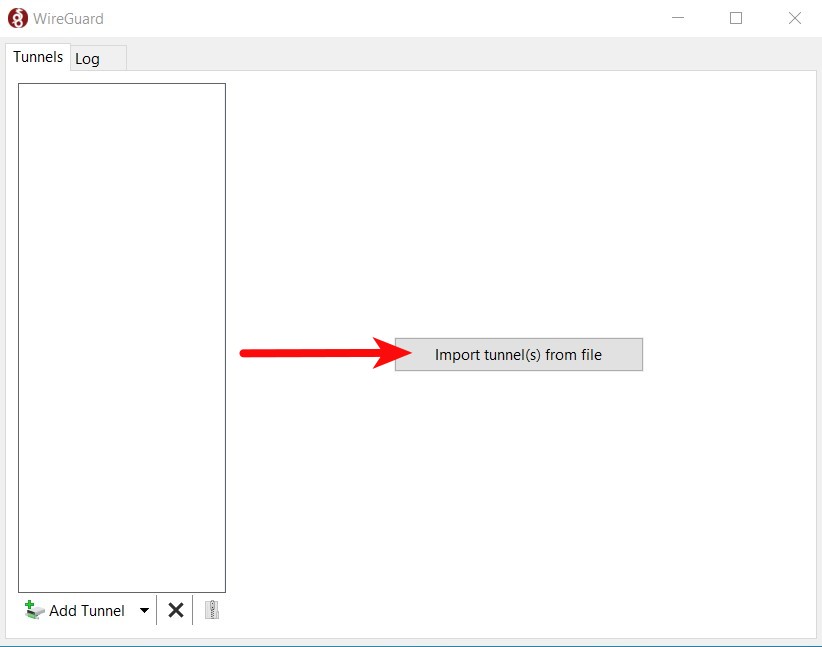
Step 4 – Import the Tunnel
Click Import tunnel(s) from file and select the downloaded client1.conf file.
Android
Step 1 – Install WireGuard
Install the WireGuard application from the Google Play Store.
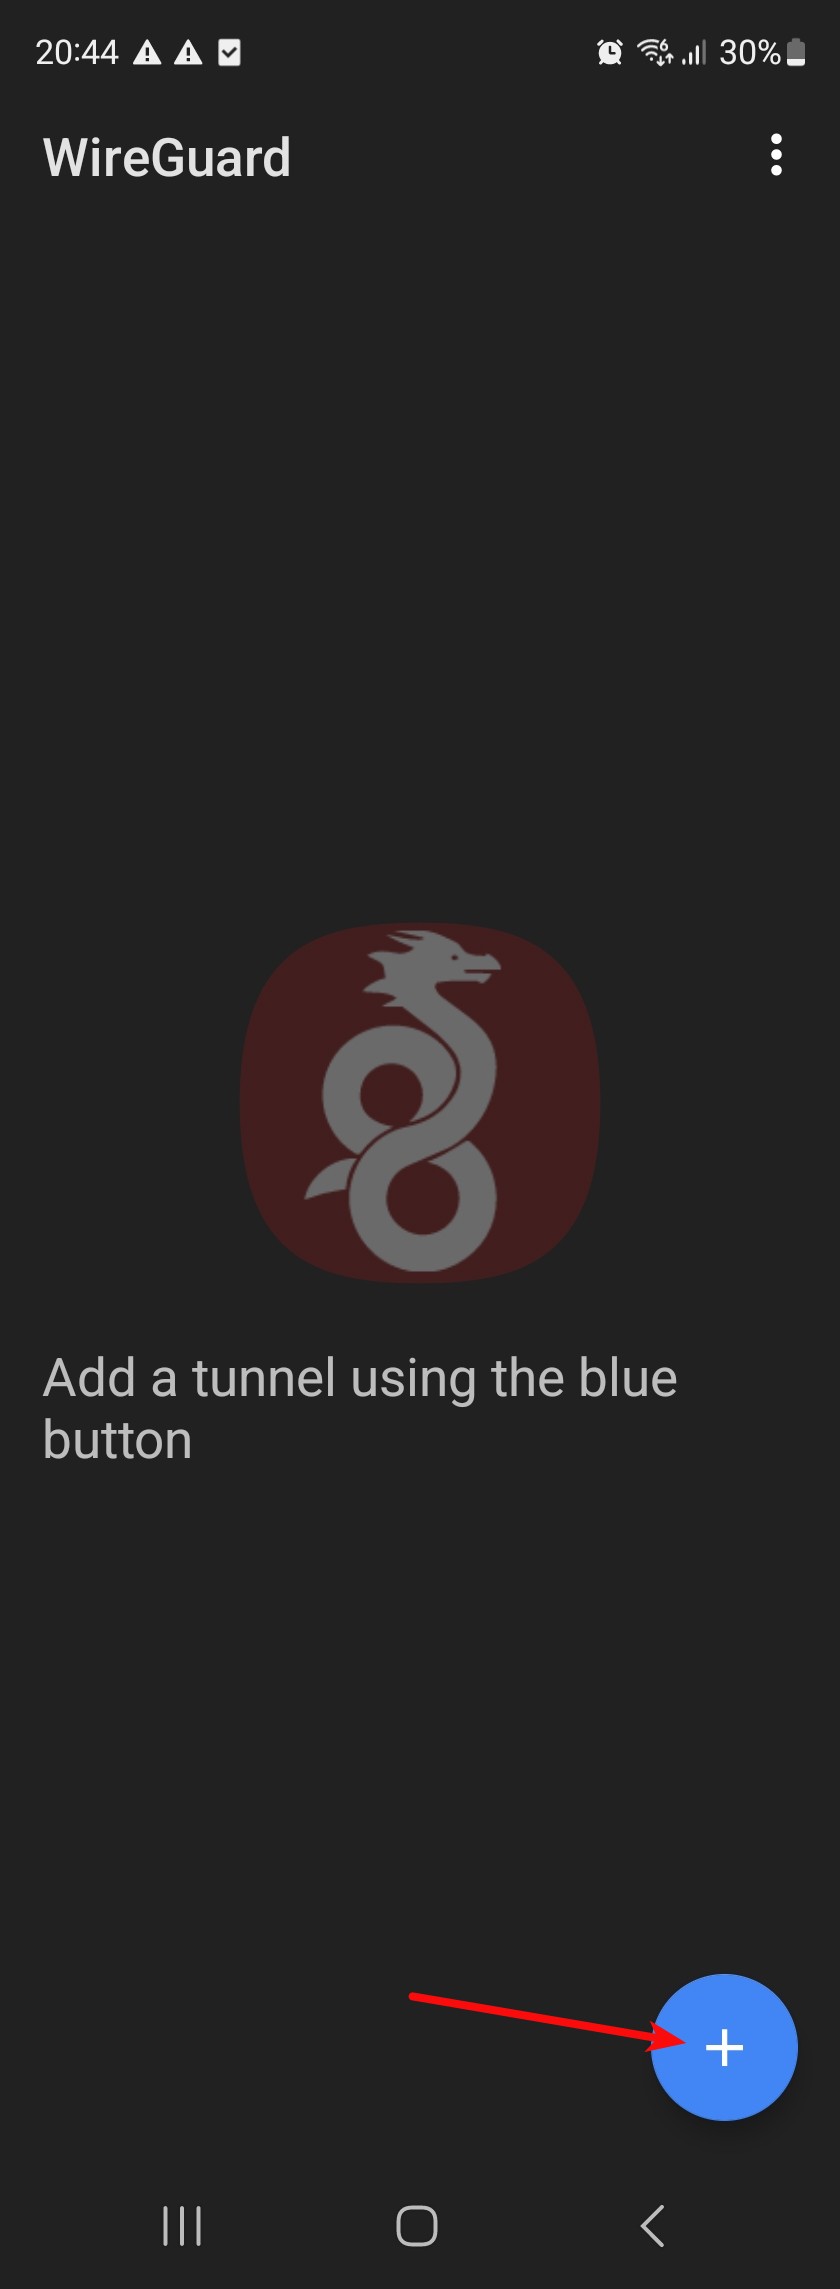
Step 2 – Import the Tunnel
You can import the WireGuard tunnel in one of two ways:
- Download one of the client configuration files, for example client1.conf, and import it in the WireGuard app.
- Generate the QR code in the Client Area and scan it directly using the WireGuard app.
For Android, the easiest method is to generate the WireGuard QR code in the Client Area, open the WireGuard app, tap the + button and scan the QR code.
iOS
Step 1 – Install WireGuard
Install the WireGuard application from the App Store.
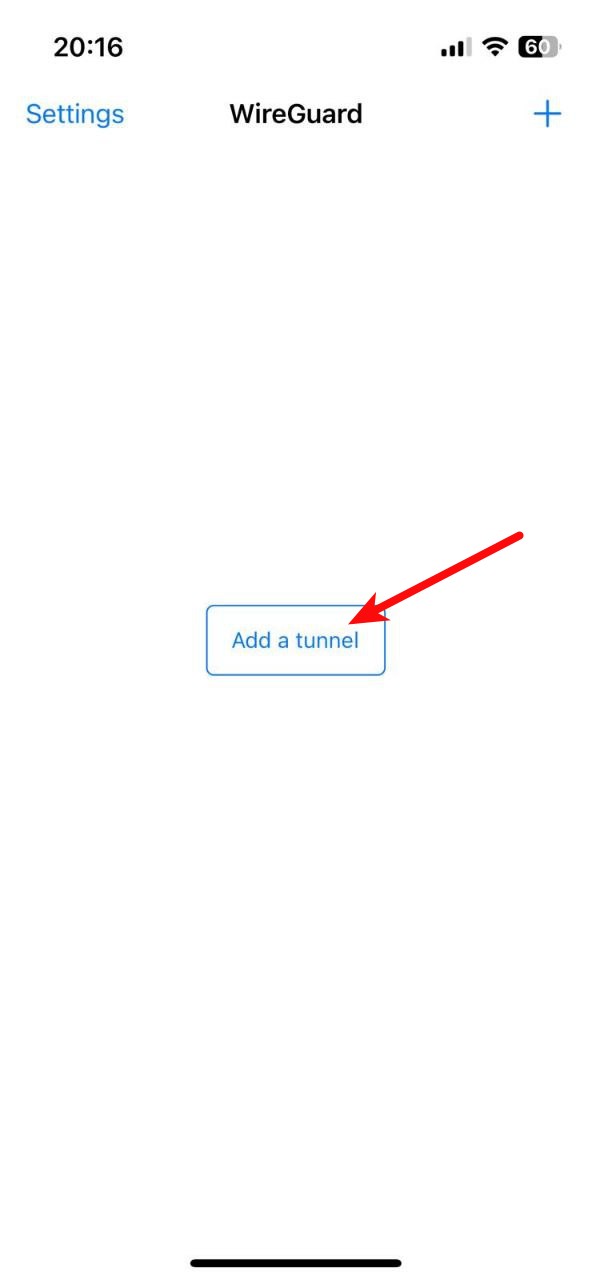
Step 2 – Import the Tunnel
You can import the WireGuard tunnel in one of two ways:
- Download one of the client configuration files, for example client1.conf, and import it in the WireGuard app.
- Generate the QR code in the Client Area and scan it directly using the WireGuard app.
For iOS, the easiest method is to generate the WireGuard QR code in the Client Area, open the WireGuard app, tap the + button and scan the QR code.
Verification
Each device must use a different client configuration file or QR code, for example client1.conf, client2.conf or client3.conf. Do not use the same peer configuration on multiple devices at the same time.
If WireGuard connects successfully, your device is now using the VPN connection. You can connect up to 3 devices simultaneously using separate peer configurations.
