

This guide explains how to create a .torrent file directly from the ruTorrent WebUI.
Creating torrents on the server is recommended because it avoids uploading large amounts of data from your local computer. Only the generated .torrent file needs to be downloaded and uploaded to your tracker.
Step 1 – Open the Torrent Creator
In ruTorrent, click the Create  button located in the bottom toolbar.
The torrent creation window will appear.
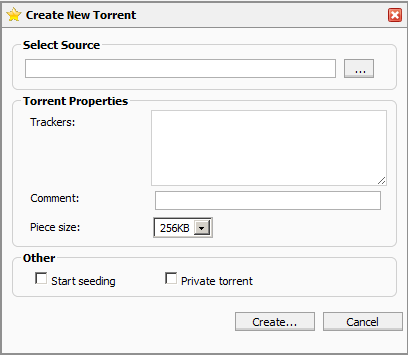
Step 2 – Select the Source
In the Select Source field, choose the file or directory that you want to include in the torrent.
Click the  button next to the field to browse your files.
Select the desired file or directory from the file browser.
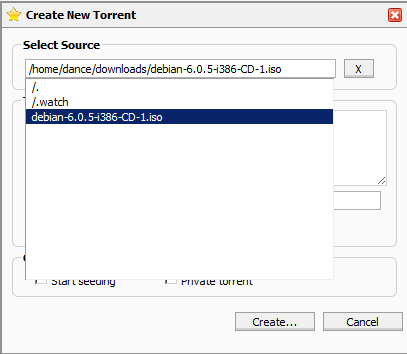
Step 3 – Configure the Torrent
Enter your tracker's announce URL in the Tracker field.
If you are creating a torrent for a private tracker, enable the Private torrent option.
When everything is ready, click Create.
Step 4 – Wait for the Process to Finish
A console window will open, showing the progress of the torrent creation process.
Any errors or warnings will also be displayed here.
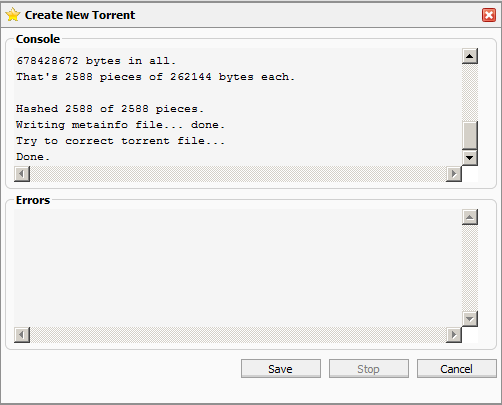
Step 5 – Save the Torrent
When the process completes successfully, click Save to download the generated .torrent file.
You can now upload this file to the tracker for which it was created.
Notes
- When using private trackers, remember to enable the Private torrent option if required by the tracker.
- Always use the correct announce URL provided by your tracker.
- The generated .torrent file contains only metadata. Your actual files remain on the server.
