

This guide explains how to connect to your SeedHost service using CuteFTP.
The examples below show how to configure standard FTP, FTP over TLS (FTPS) and SFTP connections.
Step 1 – Download and Install CuteFTP
Download the latest version of CuteFTP from:
http://www.cuteftp.com/trial.aspx
Install the application and launch CuteFTP.
Step 2 – Get Your Connection Details
Before configuring CuteFTP, you will need your service connection details.
Log in to your SeedHost Client Area:
https://www.seedhost.eu/client-area/clientarea.php
Navigate to:
Services → My Services → Your Service → View Details
You can find the required connection details in the FTP Details section:
- Hostname
- Username
- Password
Step 3 – Configure the Connection
Click Site Manager.
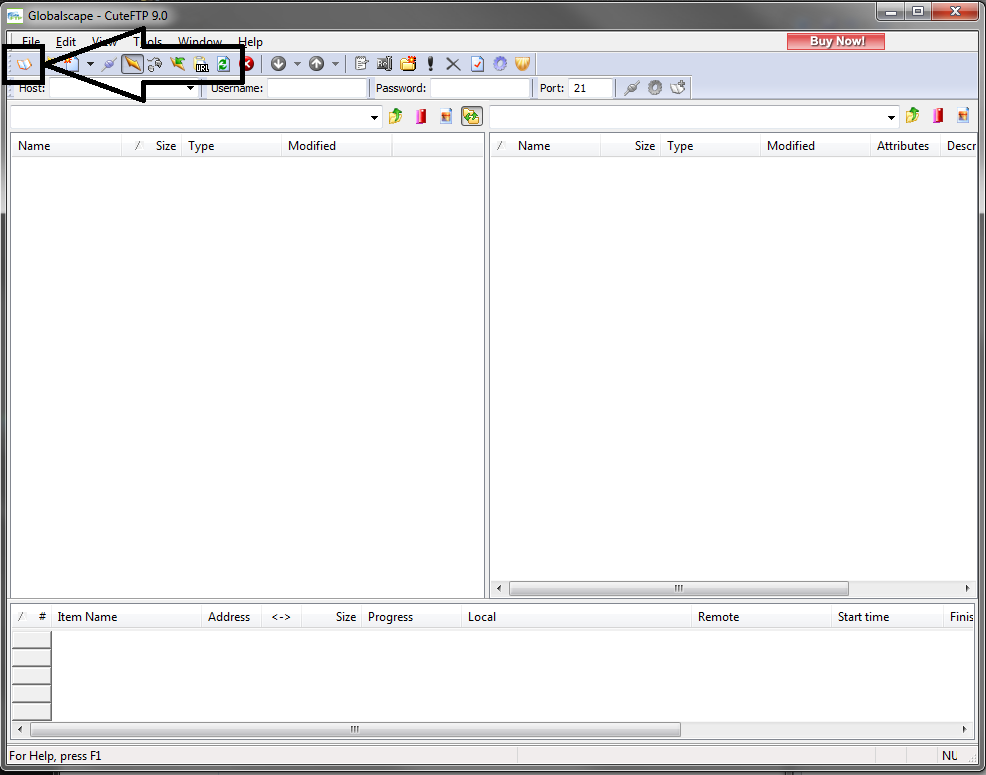
Standard FTP (Unencrypted)
Create a new FTP connection.
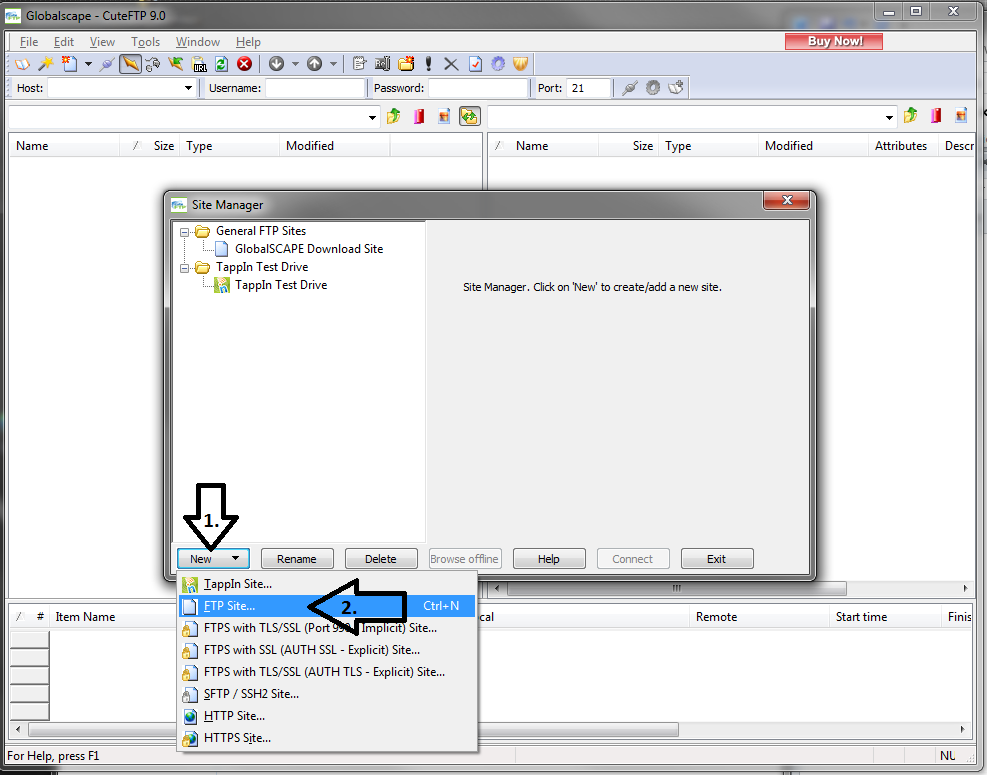
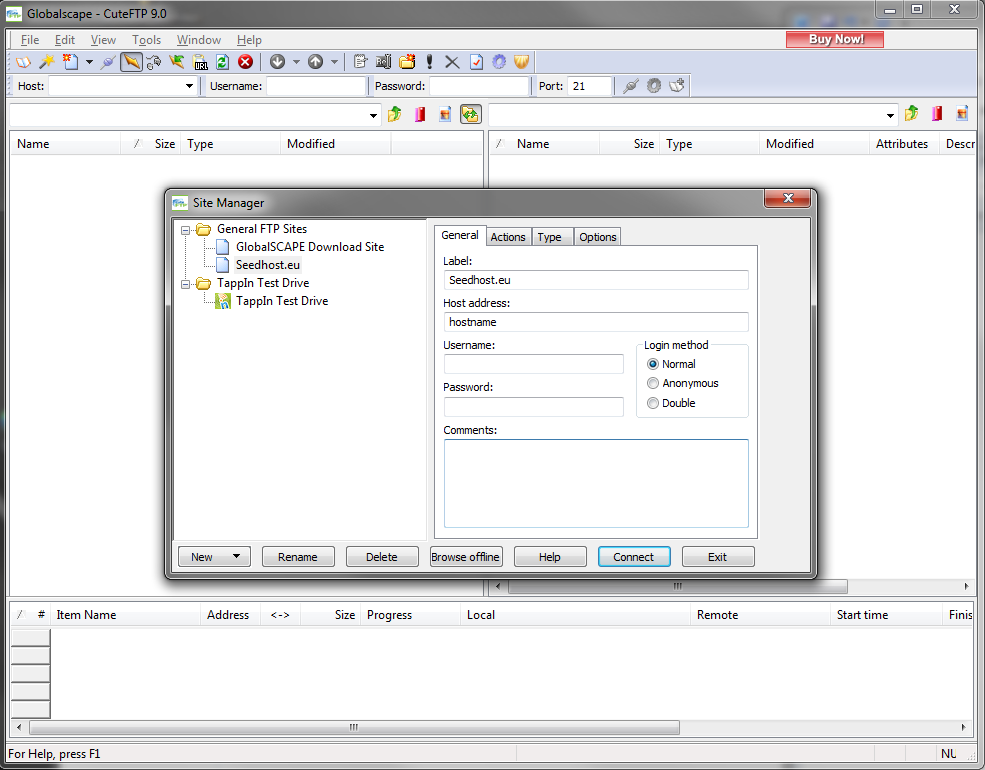
Enter the following information:
- Label – any name for the connection.
- Host Address – your server hostname.
- Username – your service username.
- Password – your service password.
- Login Method – Normal.
Click Connect.
FTP over TLS (FTPS)
Create a new FTPS connection.
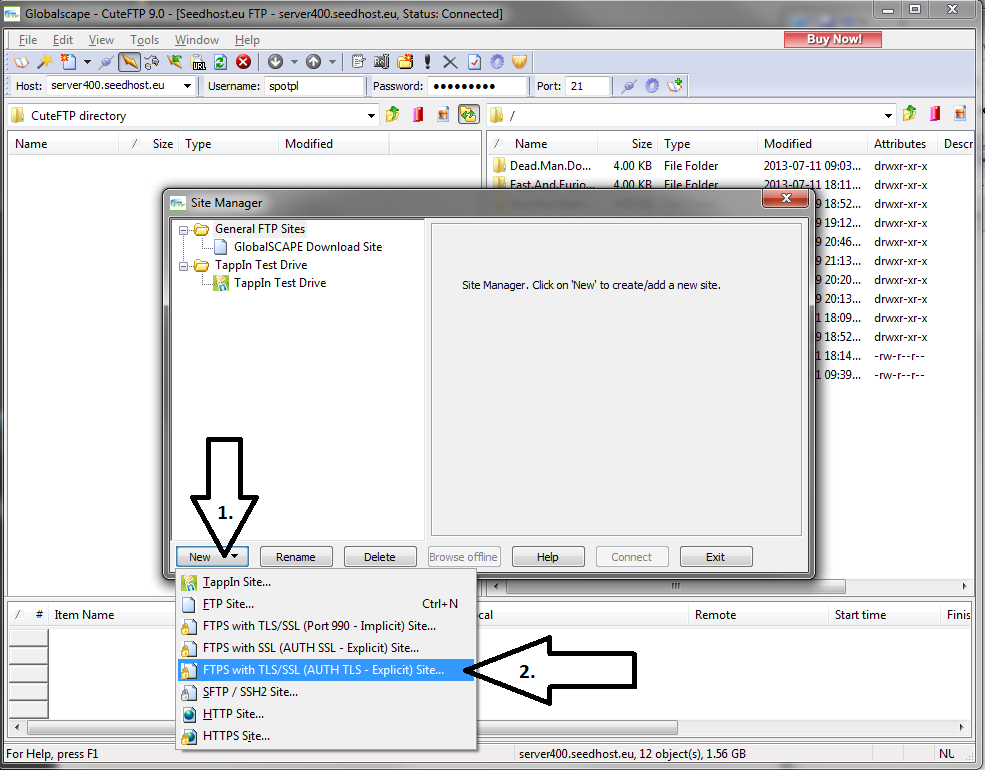
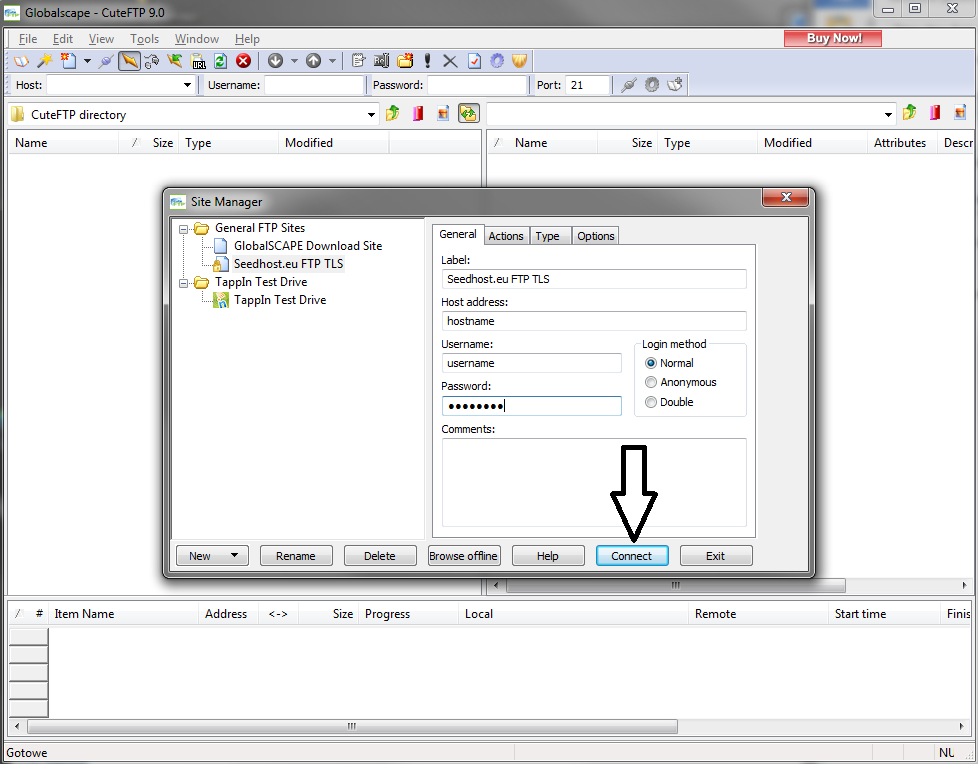
Enter the following information:
- Label – any name for the connection.
- Host Address – your server hostname.
- Username – your service username.
- Password – your service password.
- Login Method – Normal.
Click Connect.
SFTP
Create a new SFTP connection.
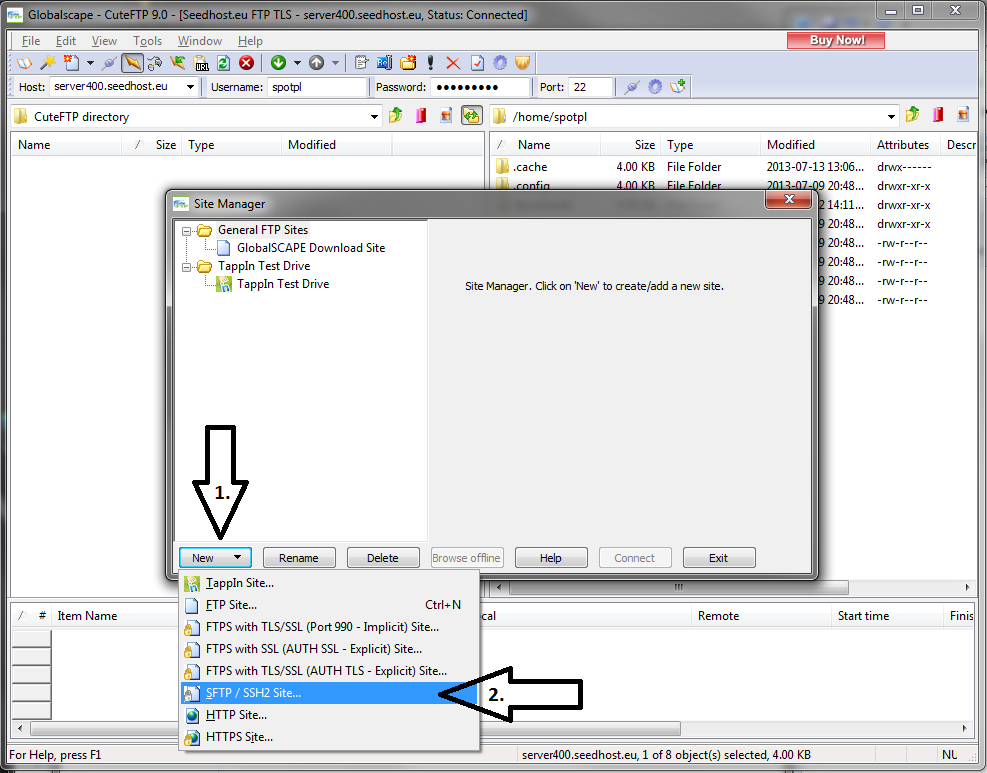
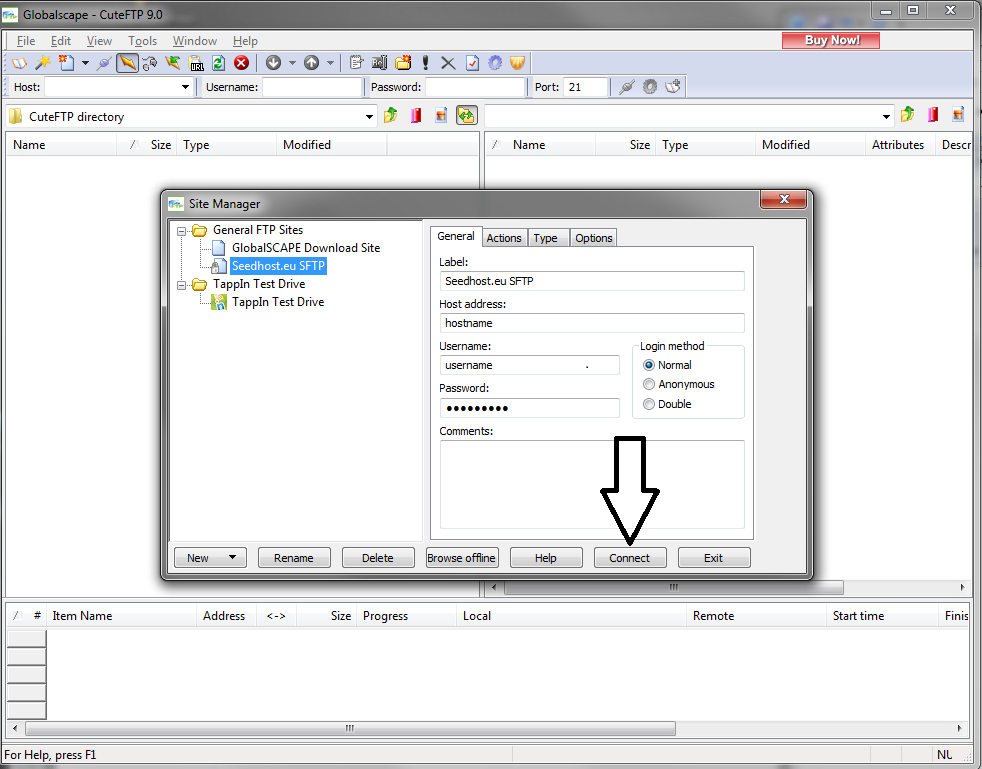
Enter the following information:
- Label – any name for the connection.
- Host Address – your server hostname.
- Username – your service username.
- Password – your service password.
- Login Method – Normal.
Click Connect to establish the connection.
Step 4 – Download Files
Once connected, you can start downloading files from your service.
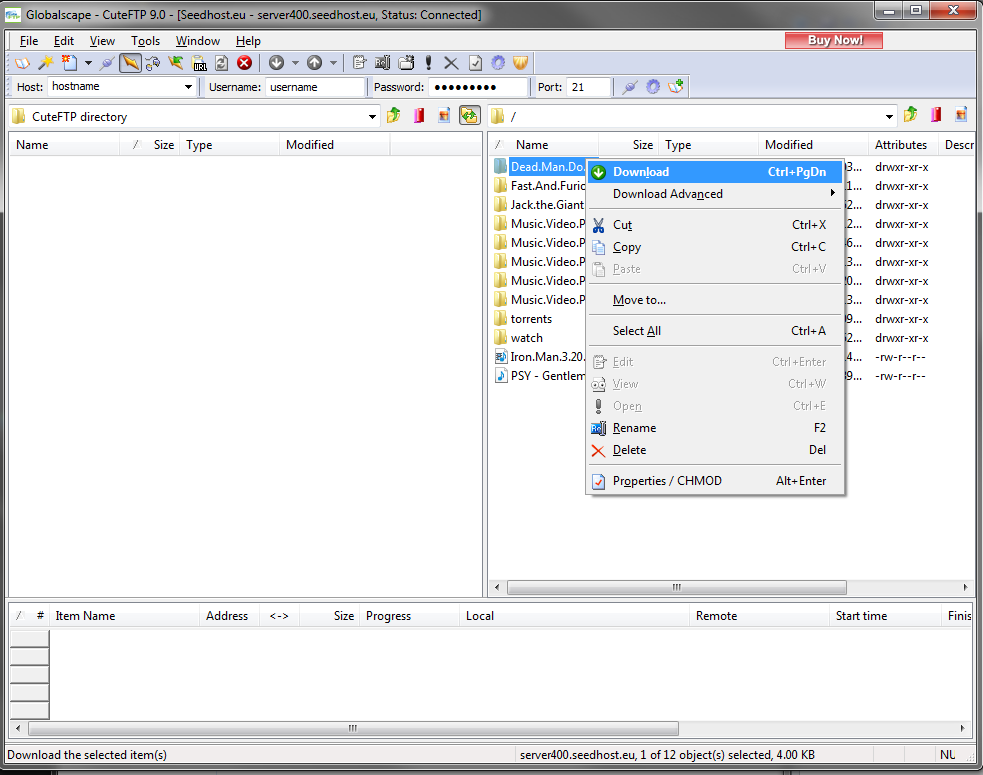
The left pane displays files on your local computer, while the right pane displays files stored on your SeedHost service.
Select the destination directory on your local computer in the left pane. Then browse to the file or directory you want to download in the right pane.
Right-click the selected file or directory and choose Download.
Enabling Multi-part Downloads
Multi-part downloads use multiple simultaneous connections to download different parts of the same file. This can improve download performance for large files, depending on your network connection.
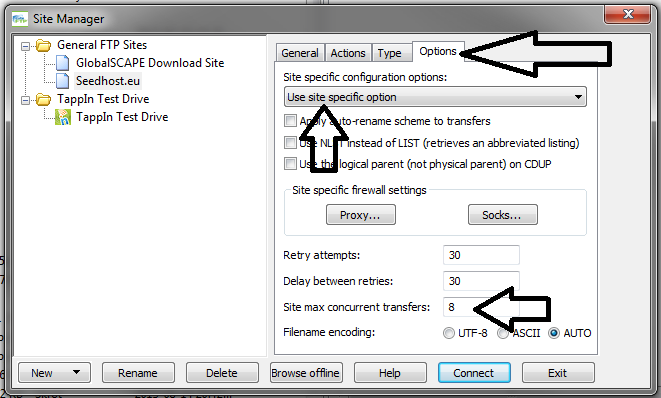
Step 1 – Configure Site-specific Settings
Open Site Manager, then go to:
Properties → Options
Change the following settings:
- Site specific configuration options → Use site specific options
- Site max concurrent transfers → 8
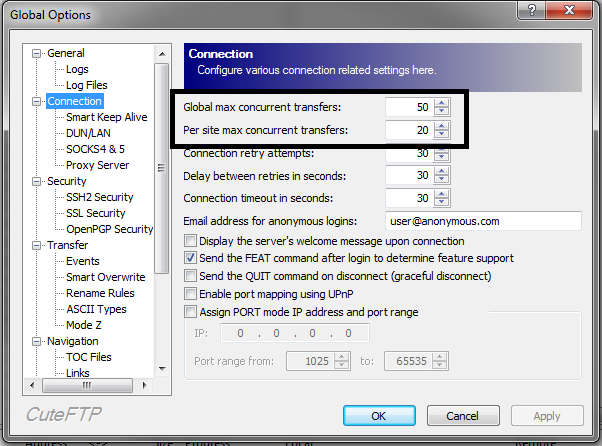
Step 2 – Configure Global Transfer Limits
Go to:
Tools → Global Options → Connection
Increase both values according to your preference.
For example:
- Global max concurrent transfers: 50
- Per site max concurrent transfers: 20
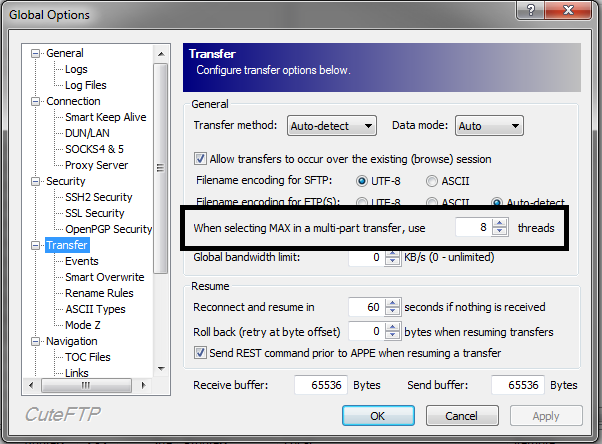
Step 3 – Configure the Number of Download Parts
Go to:
Transfer
Change the following setting:
- When selecting MAX in a multi-part transfer, use → 8
Click OK to save the changes.
Step 4 – Start a Multi-part Download
Connect to your FTP server and locate the file you want to download.
Right-click the file and select:
Download Advanced → Multi-part Download → MAX (8 parts)
While the download is in progress, expand the transfer in the Queue window by clicking the + icon. This allows you to verify that the file is being downloaded using multiple simultaneous connections.
Notes
- SFTP is the recommended protocol whenever possible, as it provides encrypted file transfers over SSH.
- Multi-part downloads are most effective when downloading large files.
- Using too many simultaneous connections may reduce performance on slower internet connections.
- If you experience connection problems, reduce the number of concurrent transfers and download parts.
