

This guide explains how to configure FlashFXP and perform direct server-to-server (FXP) transfers.
On SeedHost services, FXP is enabled by default. To perform a successful server-to-server transfer, the remote FTP server must also support and allow FXP connections.
Step 1 – Download and Install FlashFXP
Download the latest version of FlashFXP from:
http://www.flashfxp.com/download
Install the application and launch FlashFXP.
Step 2 – Create a New Site
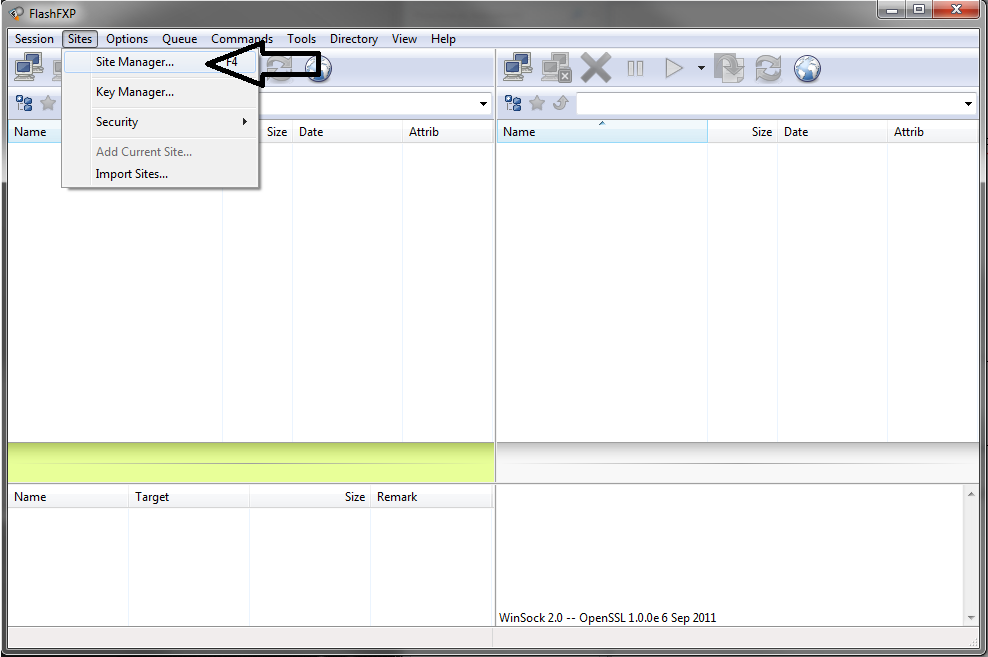
Open:
Sites → Site Manager
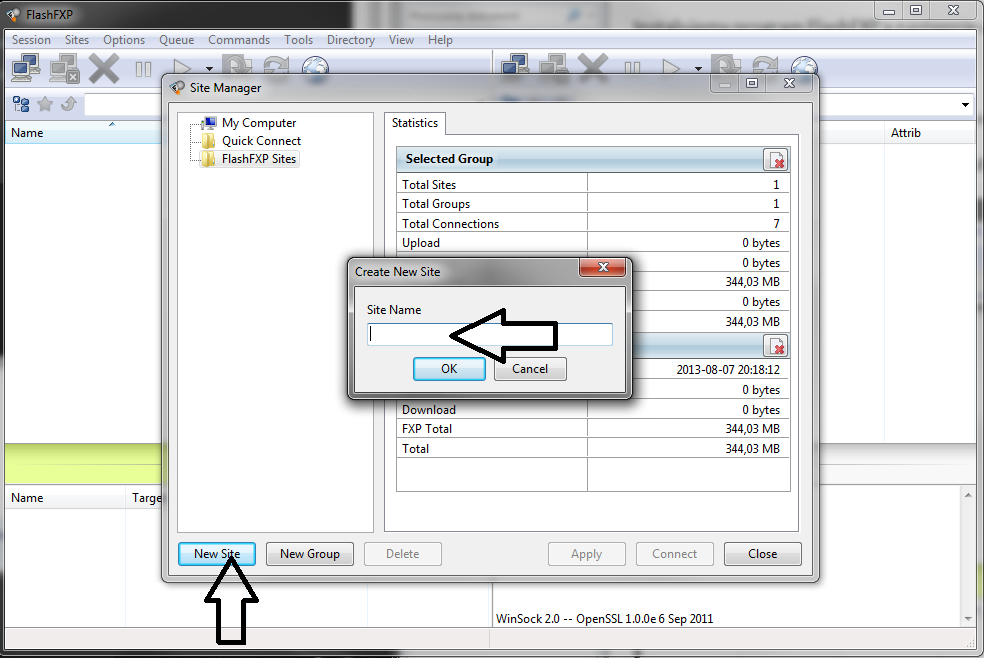
Click New Site and enter any name for the connection.
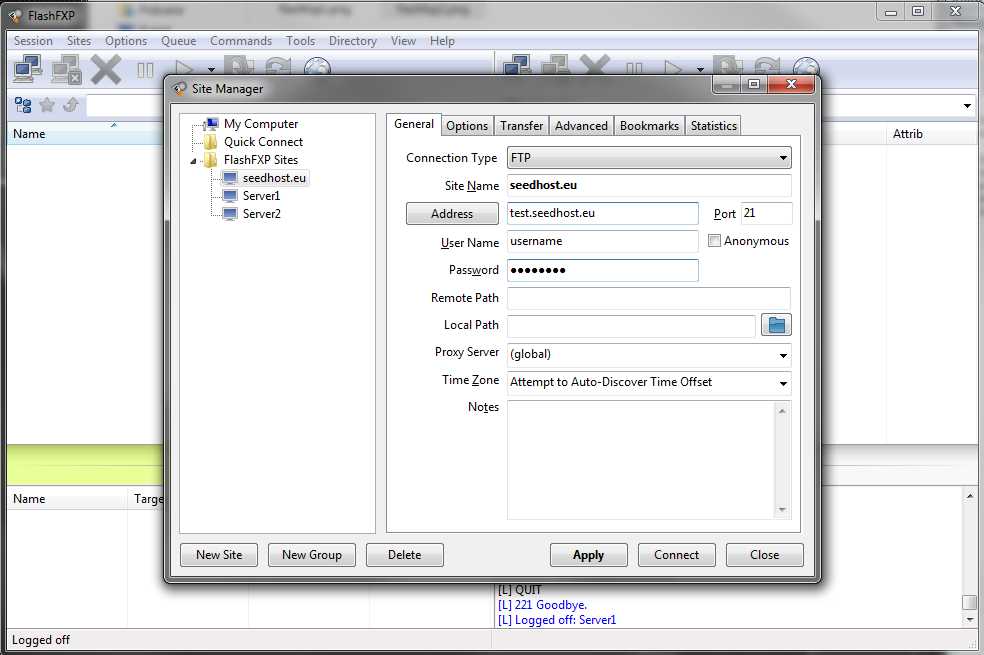
Step 3 – Configure the Connection
Select one of the following connection types:
- FTP – standard unencrypted FTP connection.
- SFTP over SSH – encrypted SFTP connection (recommended).
- FTP using Explicit SSL (AUTH TLS or AUTH SSL) – encrypted FTPS connection.
Enter the following connection details, which can be found in the FTP Details section of your Client Area:
- Address – your server hostname or IP address.
- User Name – your service username.
- Password – your service password.
Repeat the same procedure for the second server that will participate in the FXP transfer.
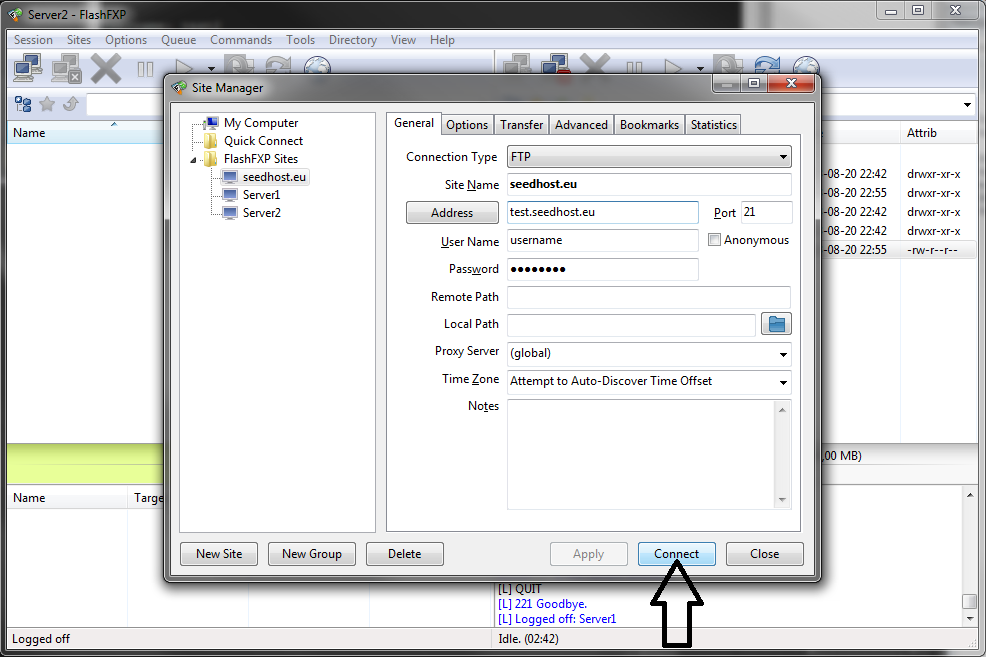
Step 4 – Connect to Both Servers
Using the Site Manager, connect to the first server and then to the second server by clicking Connect.
Step 5 – Transfer Files Using FXP
Select the file or directory you want to transfer, right-click it and choose:
Transfer
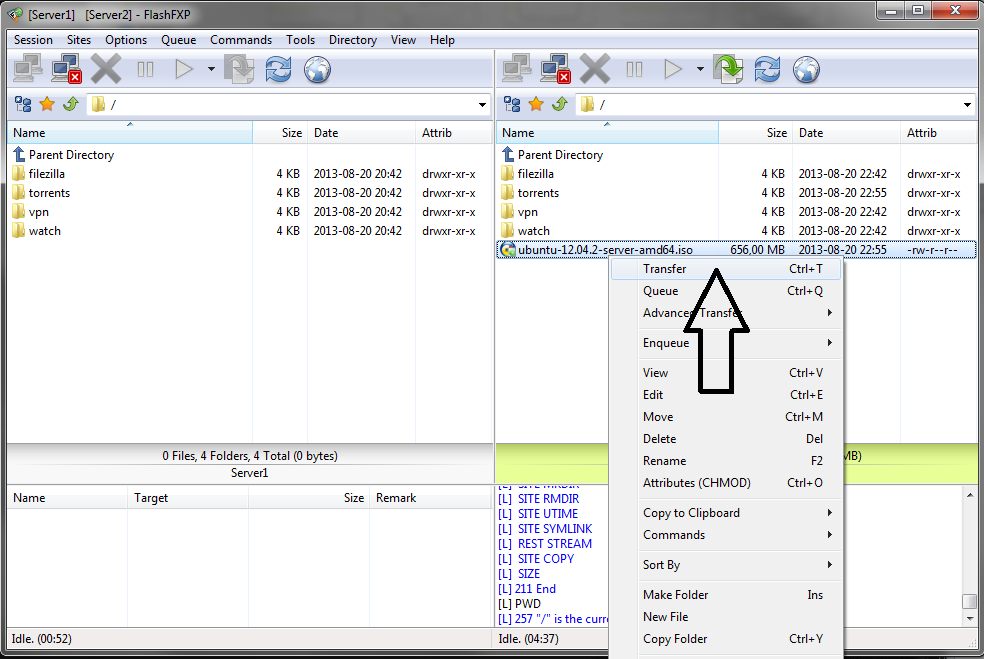
Important: FXP transfers will only work if the FXP feature is enabled on both FTP servers.
If everything has been configured correctly, the selected files will be transferred directly from one server to the other.
Notes
- FXP is enabled by default on SeedHost services.
- The remote FTP server must also support and allow FXP connections.
- SFTP connections cannot be used for FXP transfers.
- If supported by both servers, FTPS allows you to perform encrypted FXP transfers.
- If the transfer fails, verify that both FTP connections have been established successfully and that the remote server allows FXP transfers.
